
Structured Extraction
Feature overview
Purpose
Structured Extraction maps the database table to ontology object types, maps fields to object attributes, and generates object relationships through inter-table associations.
In practice: Tell the platform "which table corresponds to which type of object, which column corresponds to which attribute, and which records are related to each other."
Main features
- Three-step configuration: Fill in the basic information, table mapping and Object Type Relationships mapping in order.
- Model Binding: Select a clear project and version, and use corresponding objects and properties.
- Execution and Release: Maintain the update configuration, check the results after manual execution and release; the current update status switch is unavailable.
Scope
This page is used for tasks or map data in Ontology Applications. Menu access, operation entry and task status jointly determine the executable operations.
Before you begin
Prerequisites
- You have logged in to qOntology and have obtained the permissions for this page and the required operations.
- The database connection has been configured in [Data Sources], and the Object Types, attributes and relationships in the target project version have been established.
- Check task status, release status, and target records before executing operations.
Navigation path
【Ontology Applications】 > 【Structured Extraction】
Page overview
The list displays task status, release status, update type, update frequency and update switch. To add or modify, enter the three-step wizard. The mapping content must be consistent with the selected project version.
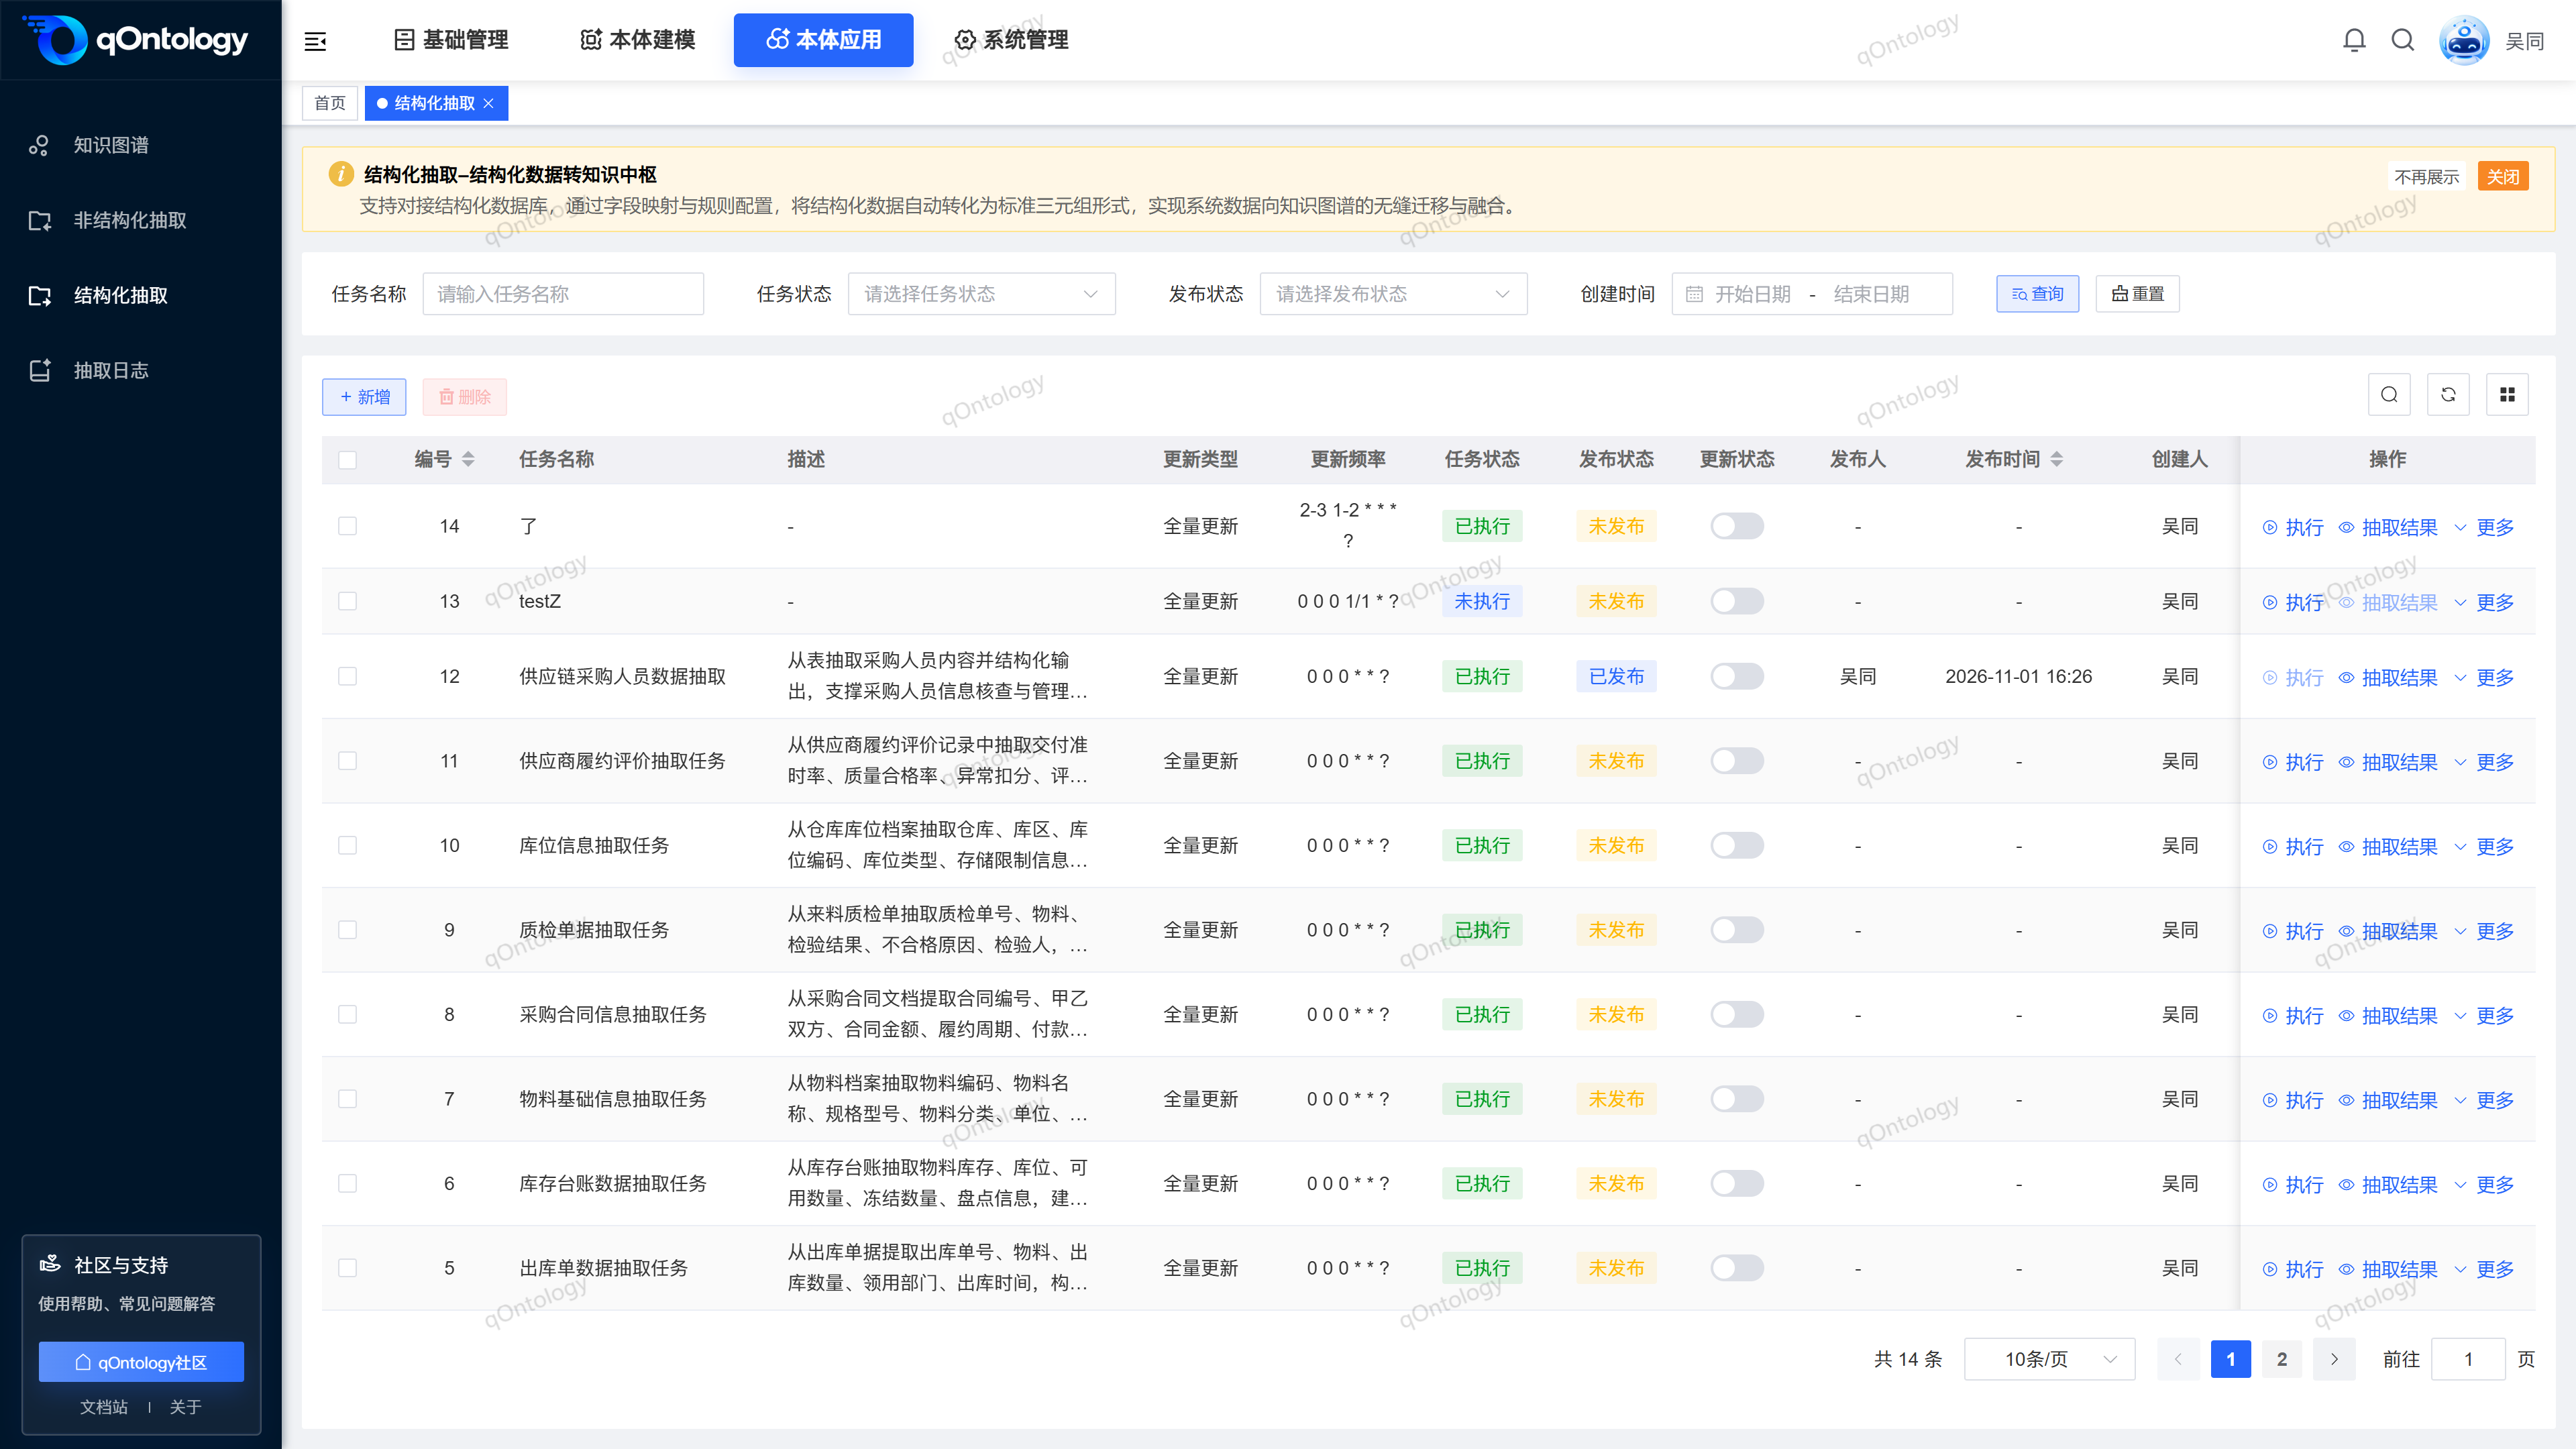
Recommended workflow
Prepare Data Sources and ontology versions → Basic information → Table and field mapping → Relationship mapping → Save → Execute → Review and release.
Functional operation instructions
Query and reset
- Fill in or select the task name, task status, release status and creation time in the query area.
- Click [Query].
- Click [Reset] when you need to restore conditions.
Result: The list is reloaded according to conditions and can be viewed in paging.
Fill in basic information
- Click [Add].
- Fill in the task name.
- Select project.
- Select a project version.
- Select Data Sources.
- Click [Test Connection].
- Select the update type.
- Set update frequency.
- Fill in the description if required.
- Click [Next].
| Field name | illustrate | Is it required? |
|---|---|---|
| Task name | Identity extraction task. | yes |
| project | Select the ontology project. | yes |
| Project version | Select the version actually used for mapping. | yes |
| Data Sources | Select the configured database connection and test the connection. | yes |
| Update type | Select full or incremental by business. | yes |
| update frequency | Use Cron expressions, which can be set via generators. | yes |
| describe | Supplementary purposes, maximum 512 characters. | no |
Result: After the basic information verification passes, the table mapping is entered; when the connection fails, the Data Sources configuration is processed first.
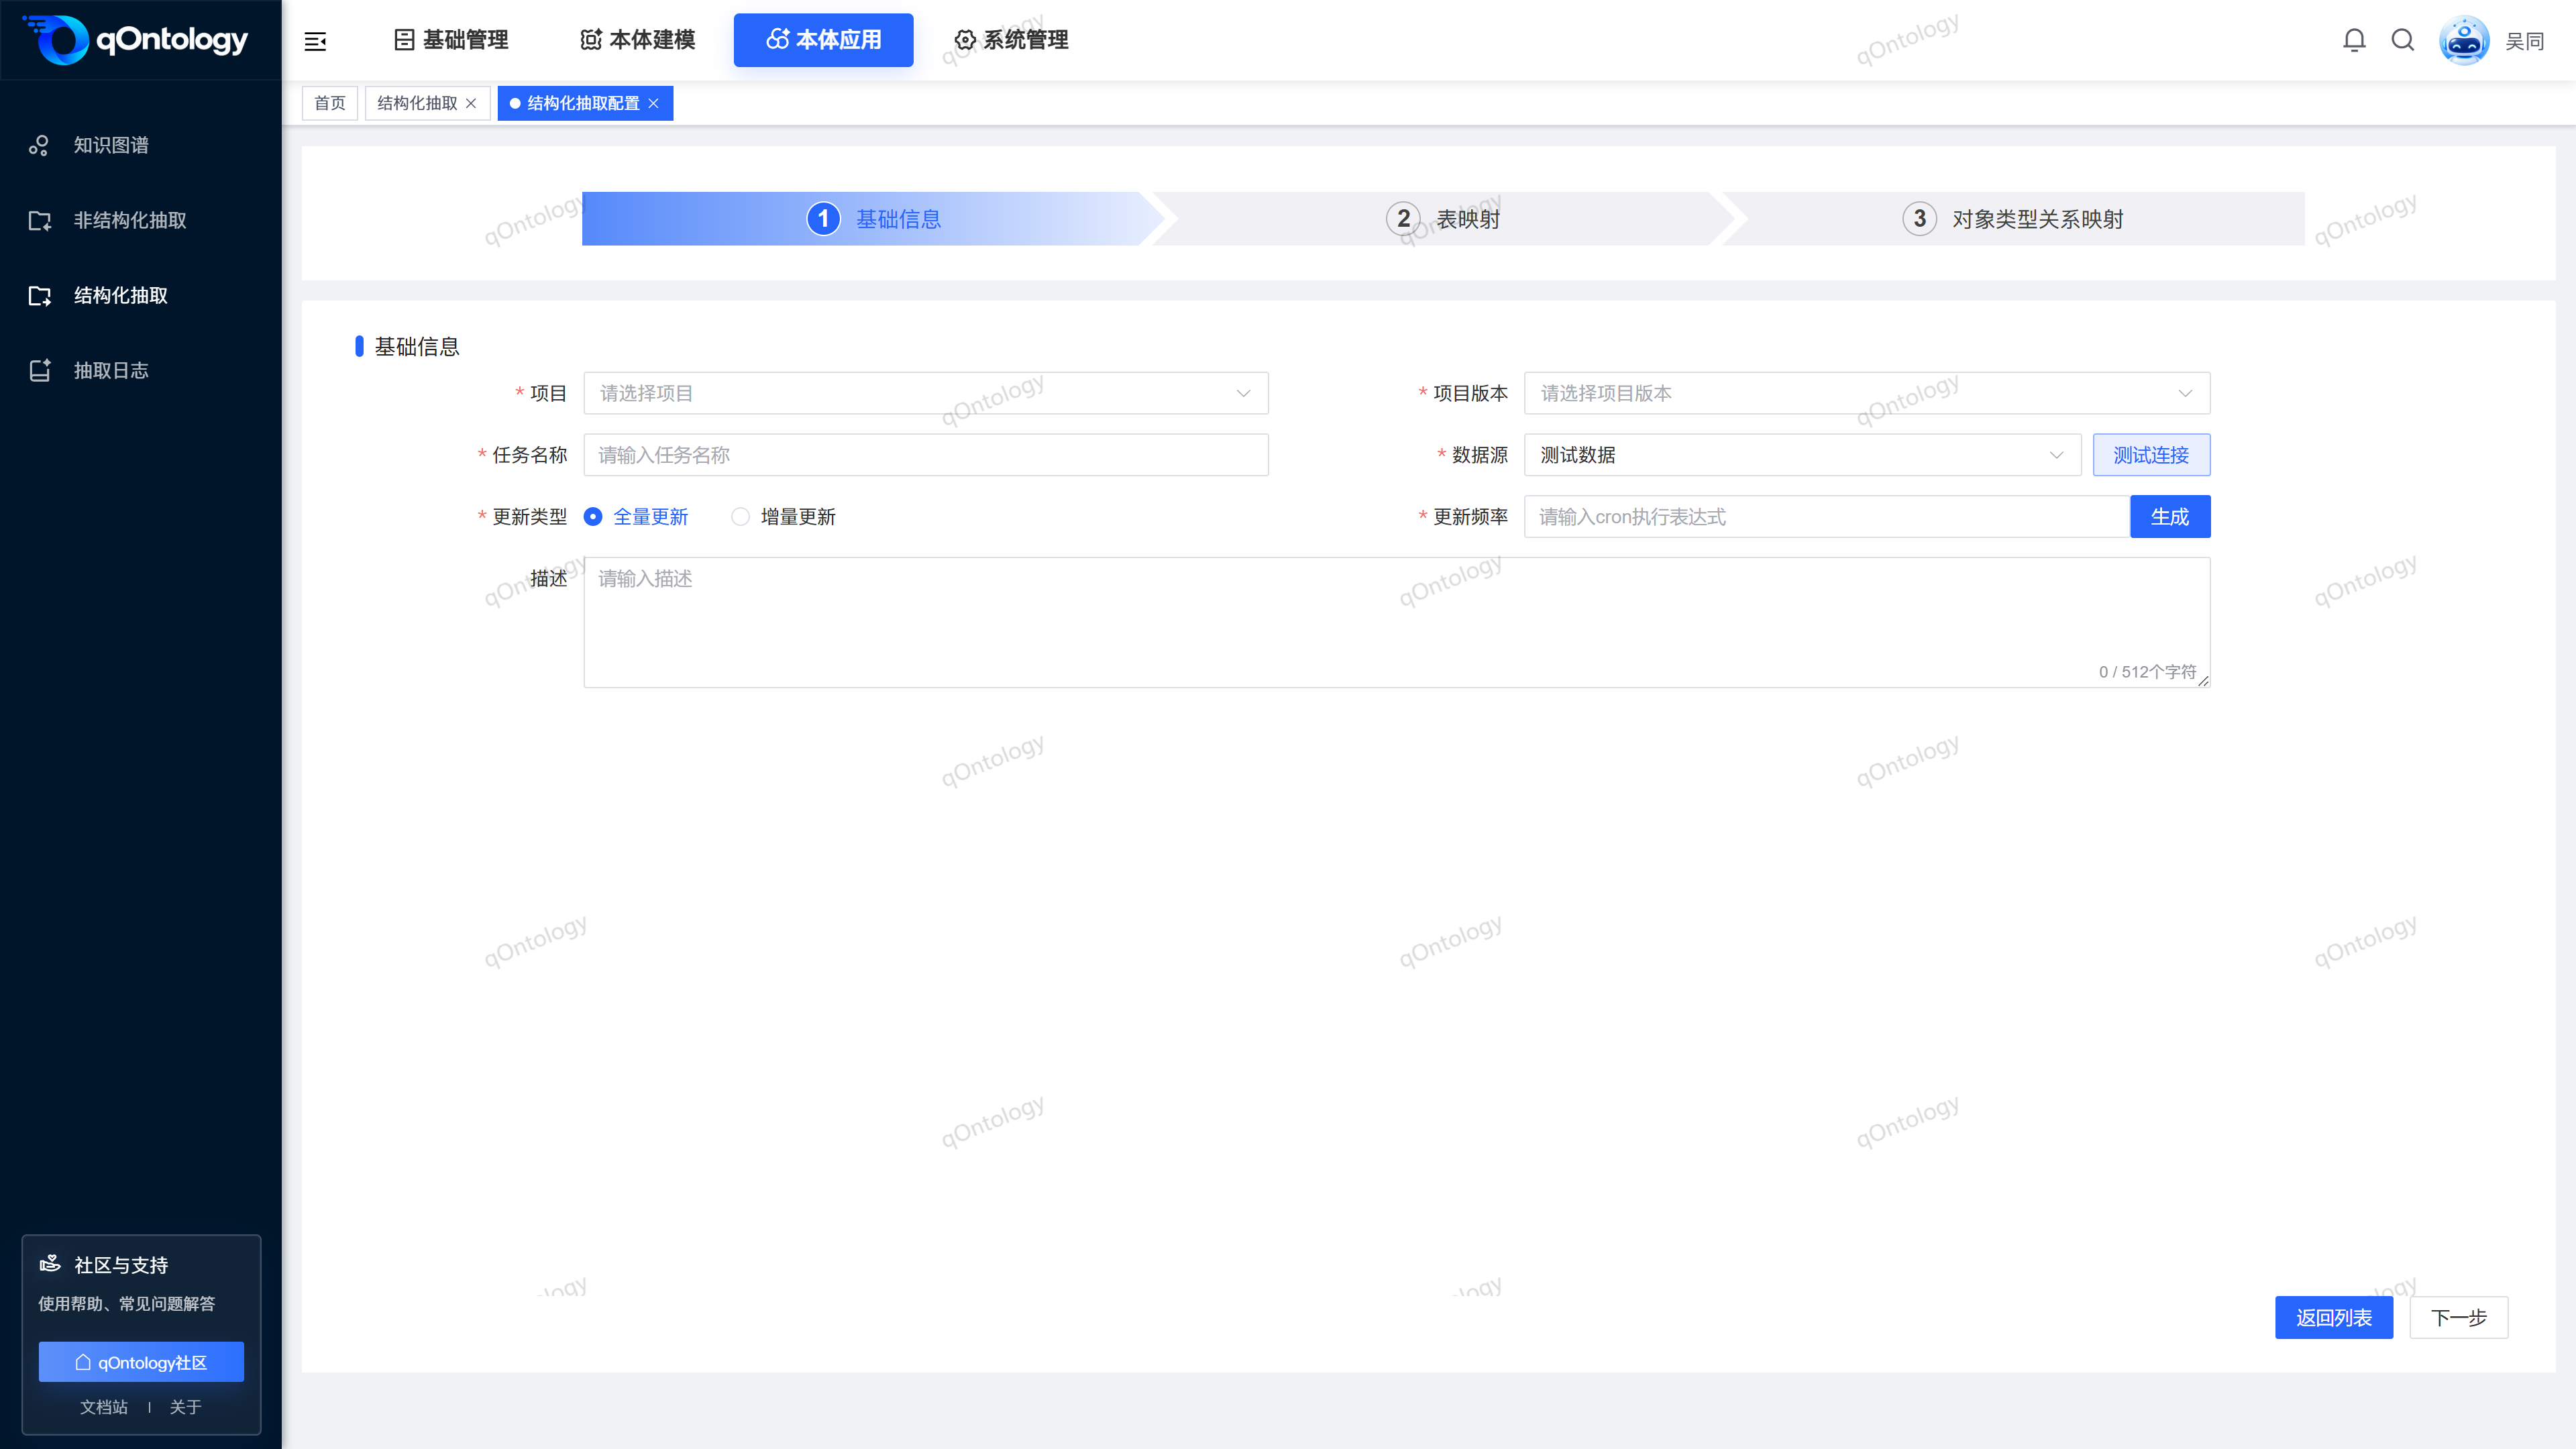
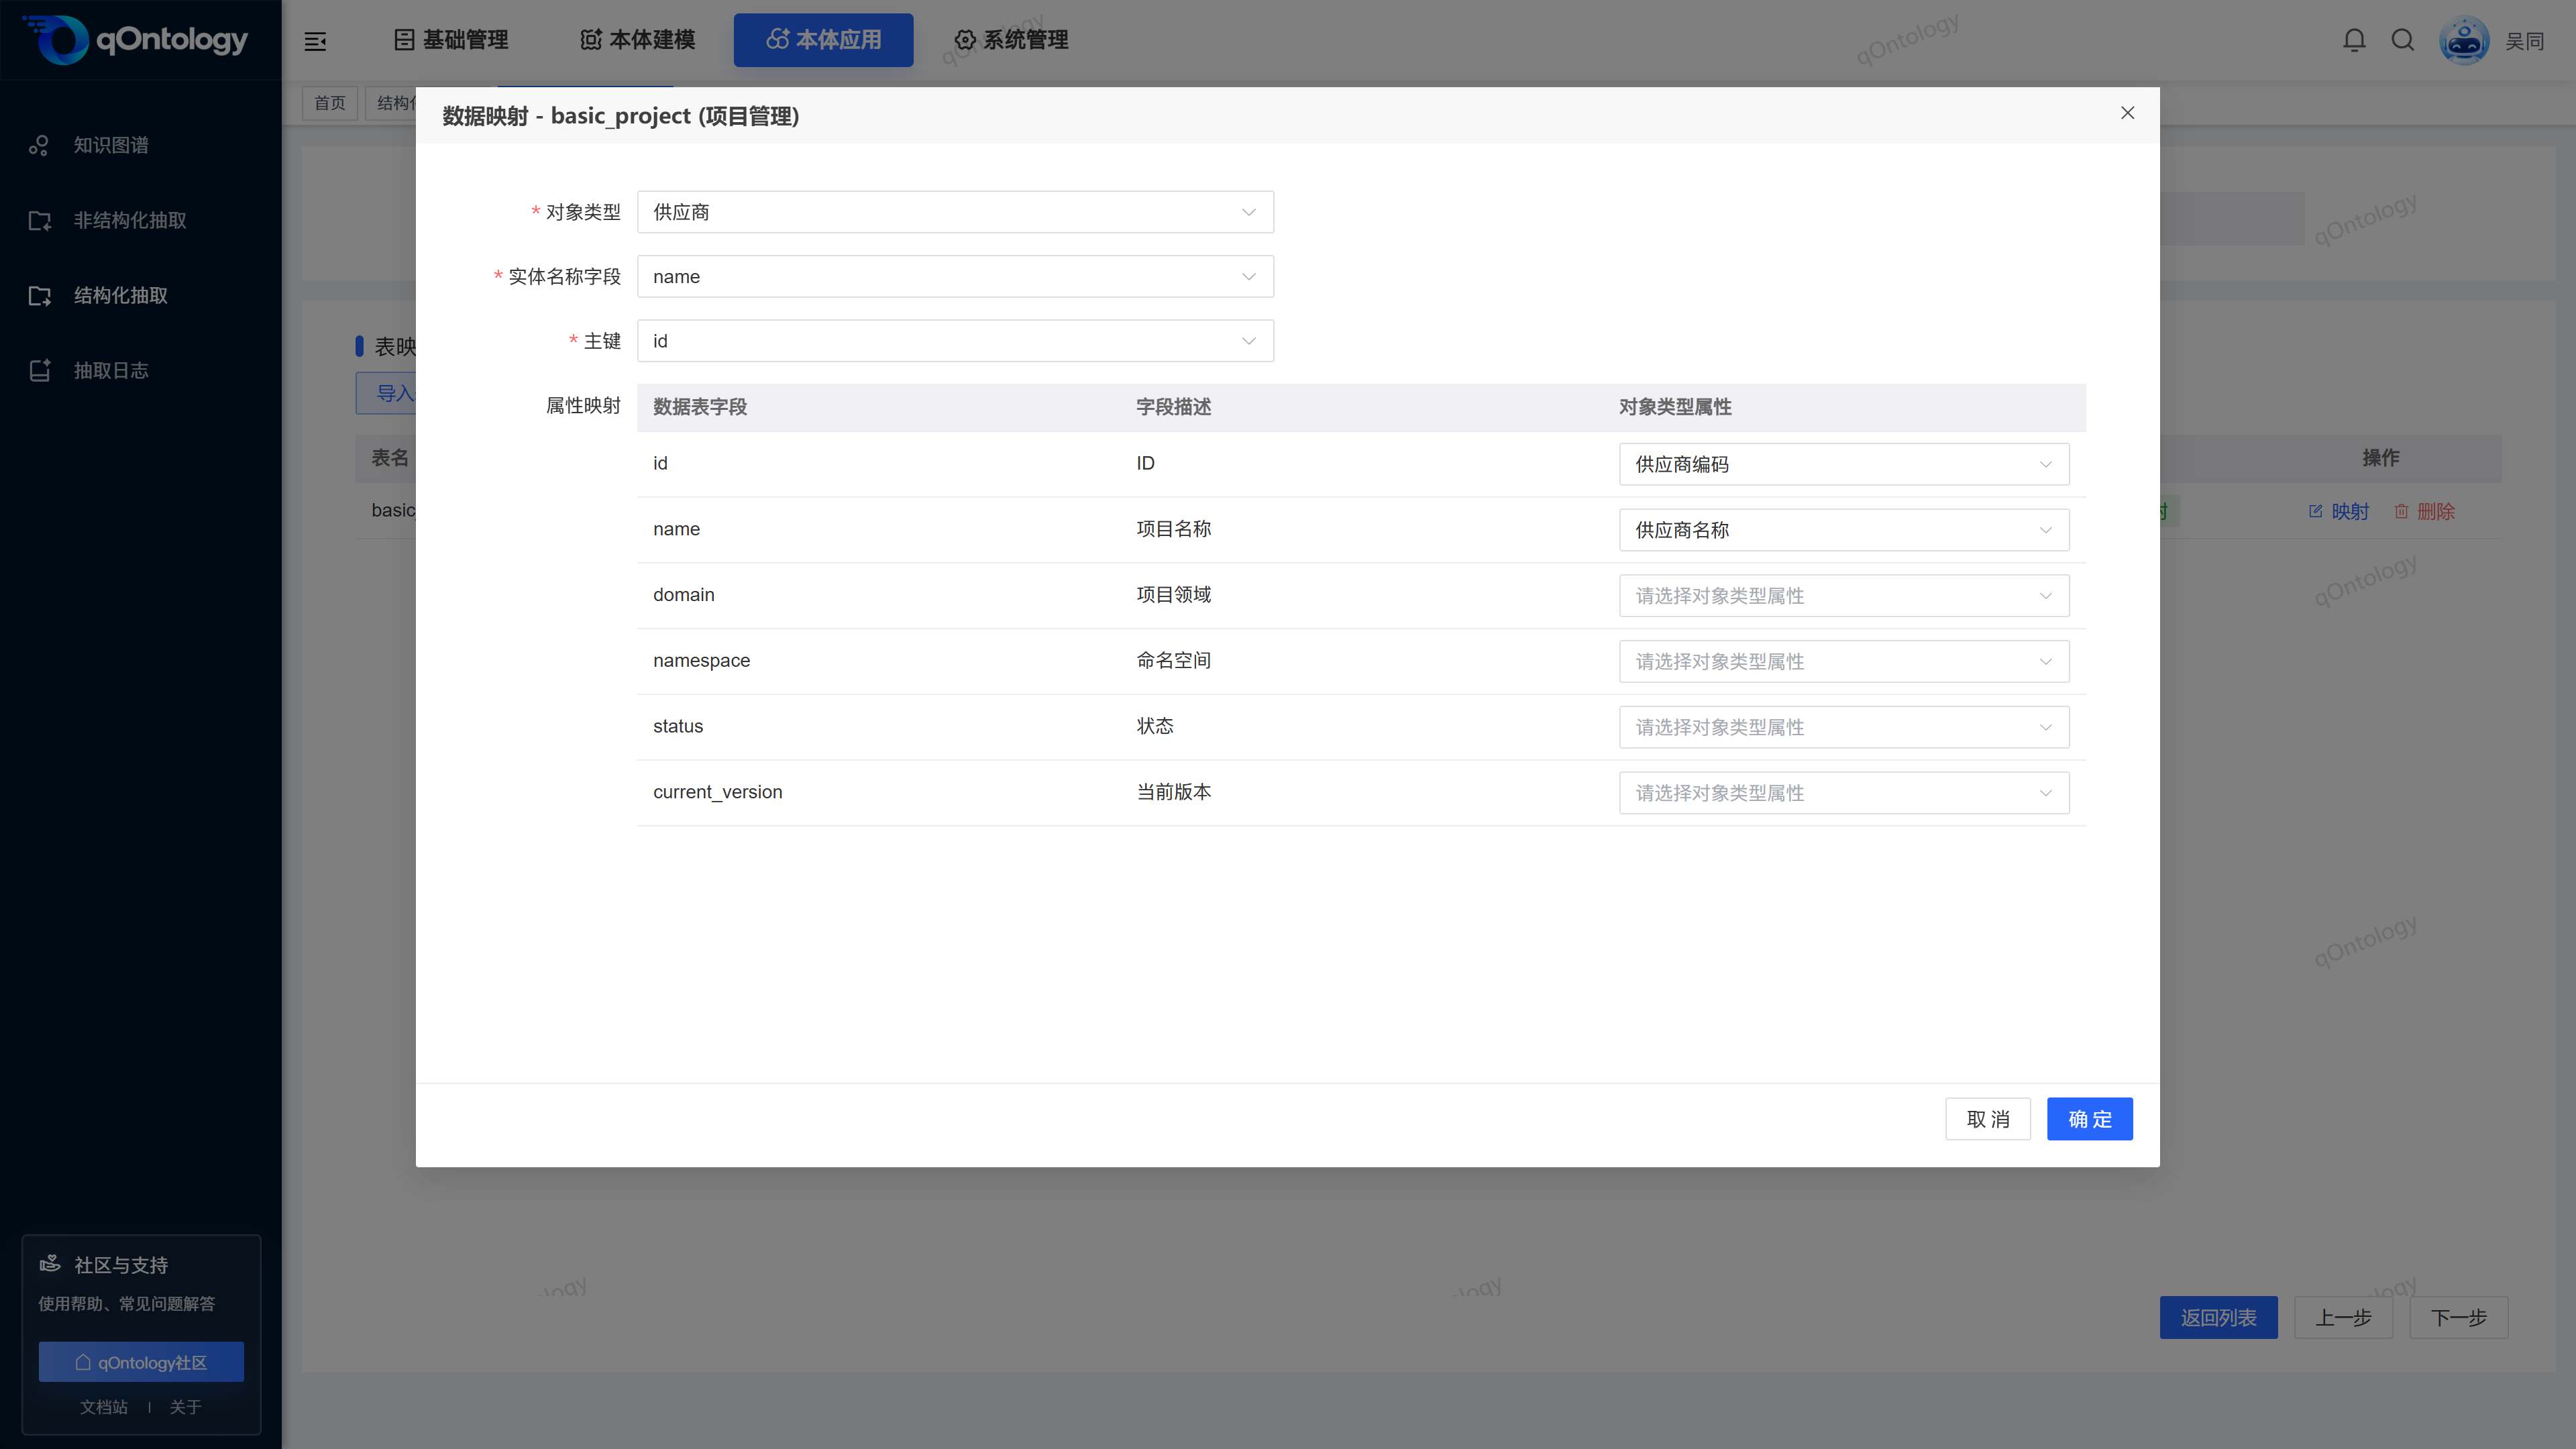
Configure table and field mapping
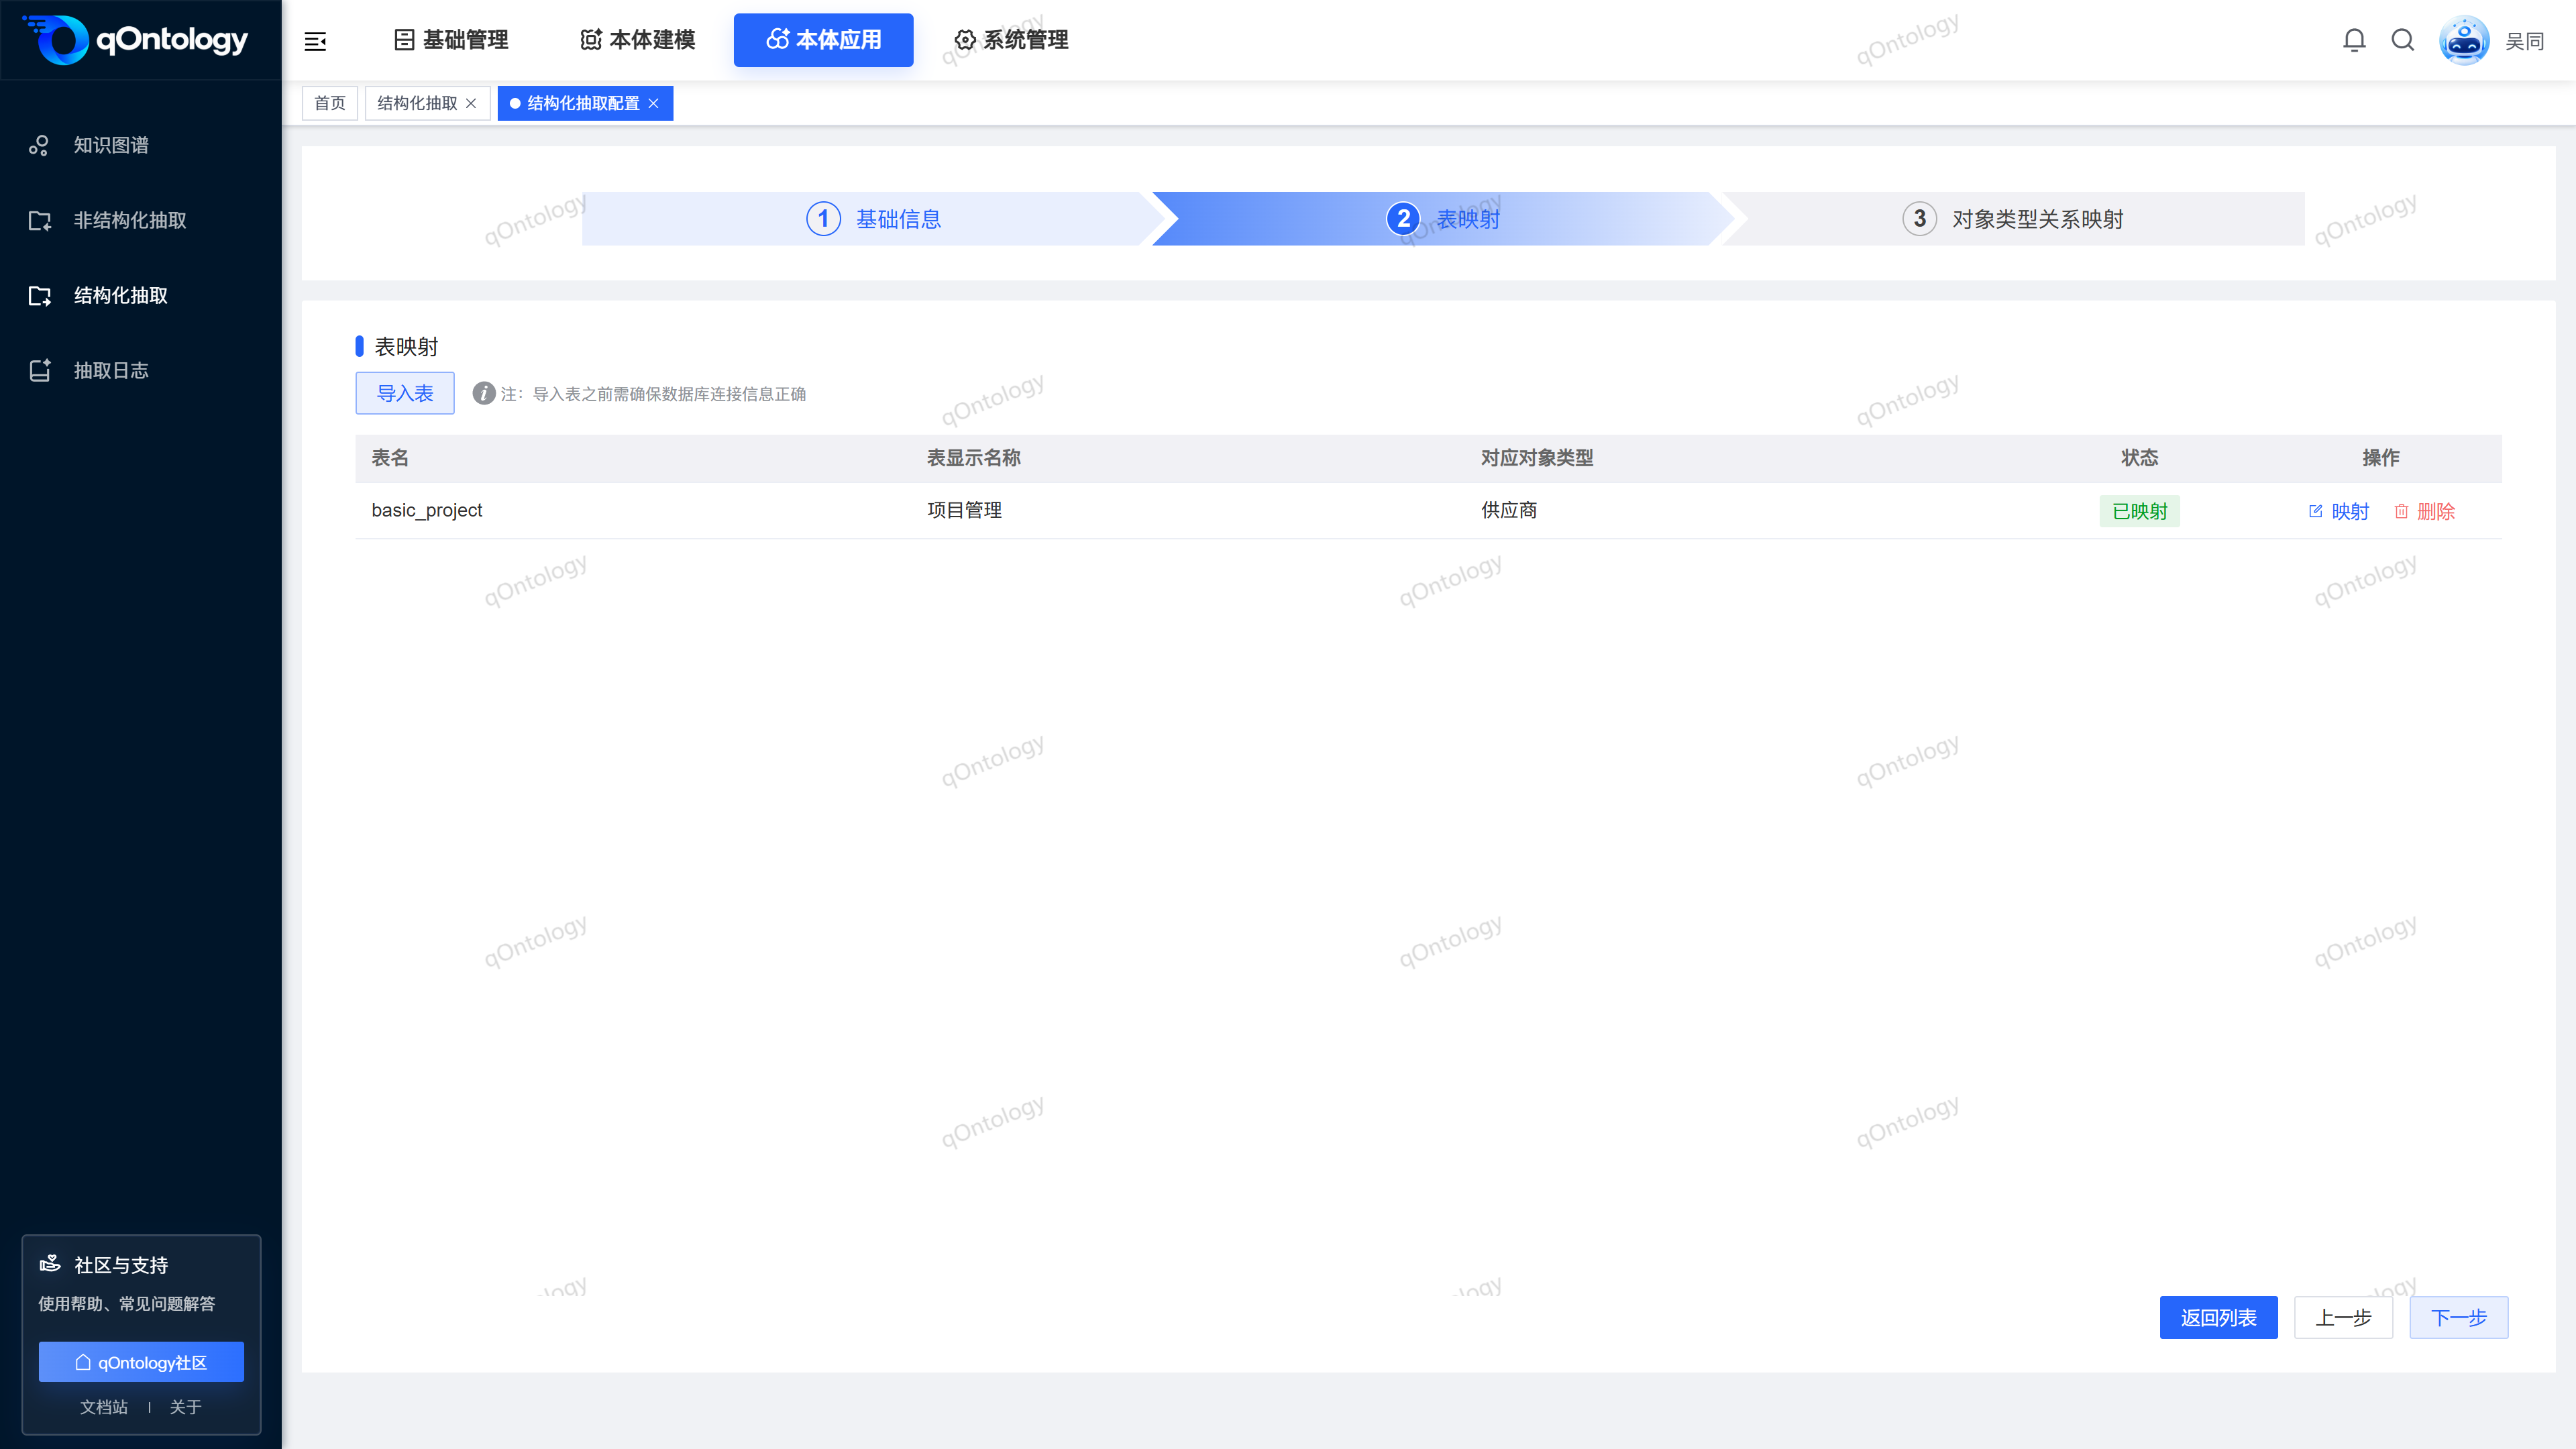
- Click [Import Table] in the [Table Mapping] step.
- Select the data table to be extracted.
- Confirm selection.
- Click [Mapping] on the target table row.
- Select Object Types.
- Select the Entity Name field.
- Select the primary key.
- Set the object properties corresponding to the fields item by item.
- Click [OK] in the mapping window.
- After all table mapping is completed, click [Next].
Result: After each table saves the mapping configuration, it enters Object Type Relationships mapping; tables without a primary key configured will be prompted as not mapped.
The entity name field is used to display records, and the primary key is used to identify records. They have different purposes. Attributes should be matched according to their business meaning and should not be copied directly from the mapping in the sample data.
When selecting incremental update, the mapping window will also ask to fill in the [increment basis field], and the appropriate time field should be selected. If there is no such field, first check the database table structure and current options.
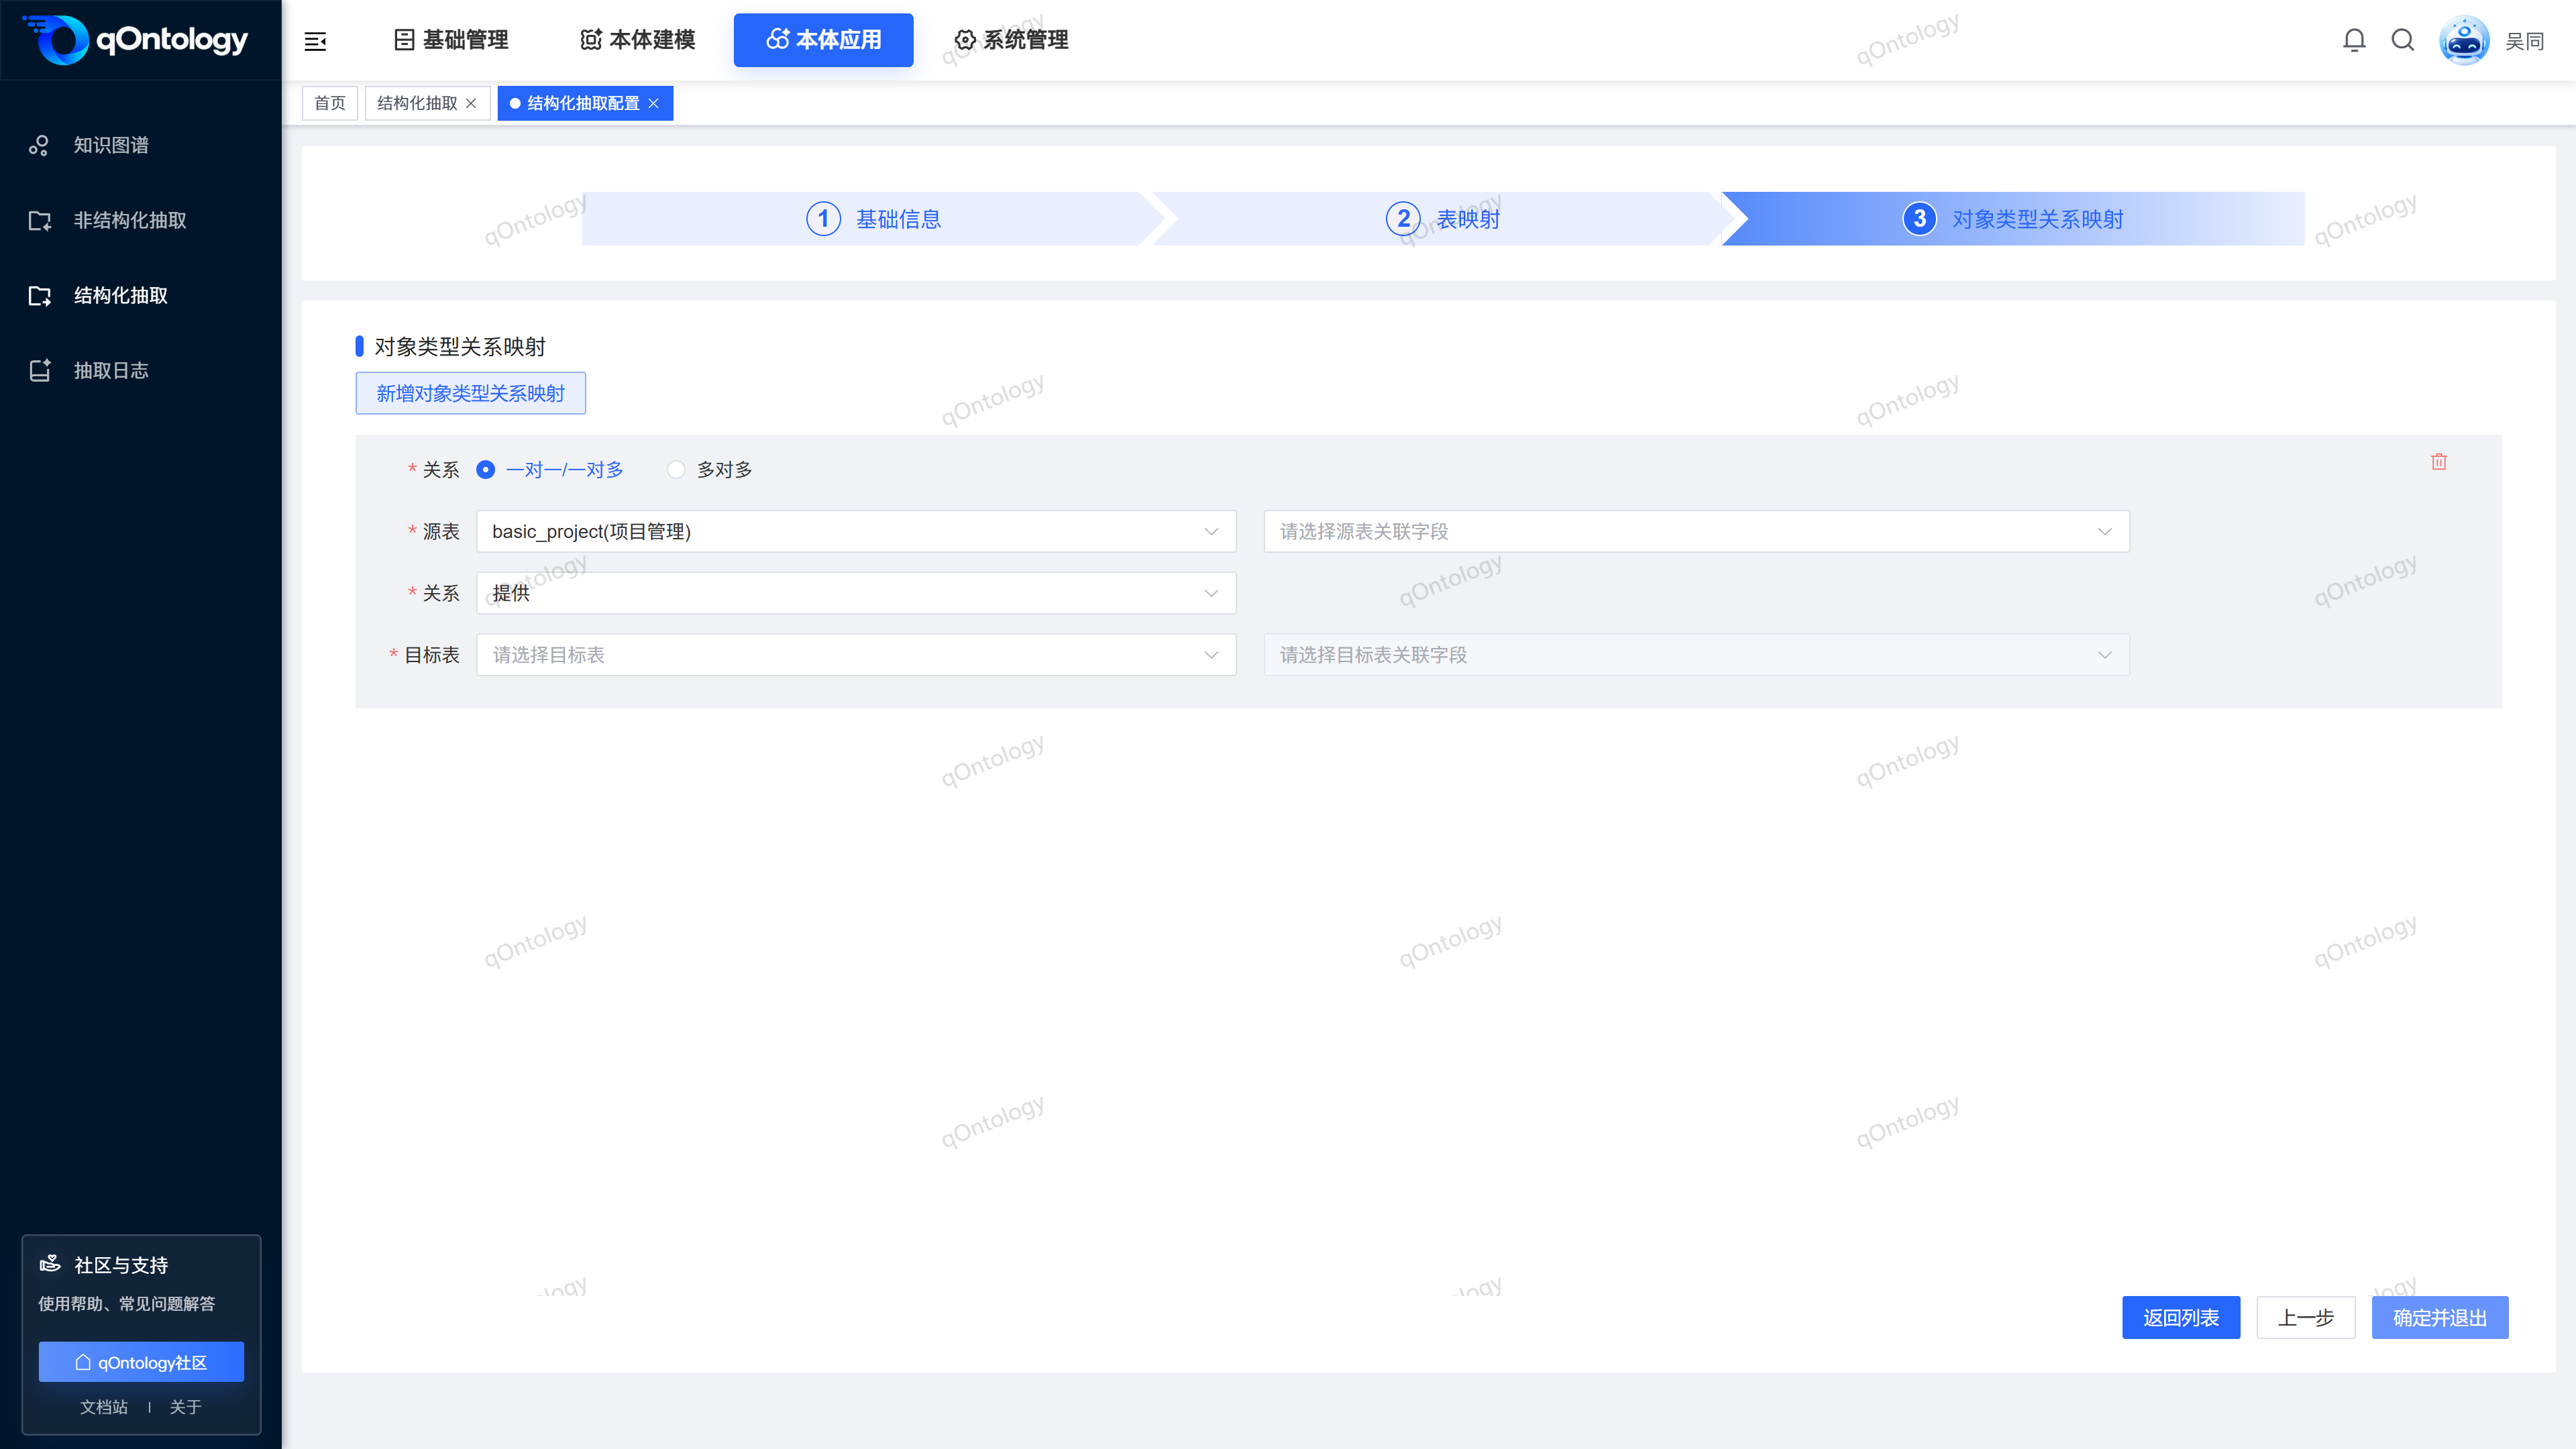
Configure Object Type Relationships mapping
- Click [Add Object Type Relationships mapping].
- Select one-to-one/one-to-many or many-to-many relationship type.
- Select the source table and source table related fields.
- Select the relationship in ontology.
- Select the target table and target table related fields.
- Many-to-many relationships supplement intermediate tables and connection fields at both ends.
- Check the mappings.
- Click [OK and exit].
Result: Return to the task list after the addition or editing is successful.
The source and target tables cannot be the same; many-to-many requires at least one intermediate table. The table association fields should be able to correspond to records at both ends, and the association direction should be consistent with the ontology relationship.
Execute and check results
- Click [Execute] in the task list.
- Check the prompts and confirm.
- View status changes.
- After the execution is completed, click [Extract Results].
- Check entities, attributes, and relationships.
Result: The task execution result is based on the status, result map and execution log; submission does not mean successful execution.
If troubleshooting is needed, go to [Execution Log] from [More]. After review, you can go to [Publish] on the results page, check the prompts and confirm; you also need to confirm and check the updated status to cancel publishing.
Maintenance update arrangements and tasks
- Check the update type and update frequency in the task list.
- When you need to adjust the configuration, go to [More] > [Modify].
- Modify the configuration in the wizard.
- Click [OK and exit].
Result: After successful saving, the updated task configuration will be displayed in the list.
Warning
The current [Update Status] switch will prompt "The current available resources are insufficient and the operation is temporarily unsupported" and the original status will be restored. Filling in the update frequency does not mean that automatic scheduling has been enabled; when extraction is required, use the currently available [Execution] entry.
To delete, use [More] > [Delete] or check the deleted entry, check the prompts and confirm; there are operation restrictions in the executing, queue and publishing status. Deleting the task will clean up the related Structured Extraction map and cannot be used as an undoing of a troubleshooting operation.
Supplementary page reference
The picture below shows a list of imported data tables. Check the table name before entering each row mapping.
FAQ
Why does it prompt "The following data table is not mapped"?
Enter the mapping window of each table to check the primary key configuration, and complete Object Types, entity name field and attribute mapping.Do table fields and object attributes automatically correspond according to the same name?
The corresponding relationship should be checked item by item in the mapping window; the same name cannot replace the business semantics check.Why is there no map data after configuration?
Save Wizard only creates task configuration, you still need to execute the task and check the results and release status.
Summarize
Tell the platform "which table corresponds to which type of object, which column corresponds to which attribute, and which records are related to each other." Prepare Data Sources and ontology versions → Basic information → Table and field mapping → Relationship mapping → Save → Execute → Review and release.