
Quick Usage
Overview
This guide is for first-time qOntology users. After deployment and login, use a purchase order and supplier example to try the complete workflow: create a project, define modeling goals, build an ontology model, extract information from a document, and review the results.
If the platform is not running yet, read Quick Deployment first. Your account needs the relevant menu and action permissions. Document extraction also requires an available extraction service and the associated model configuration.
Recommended workflow
- Log in and create a sample project.
- Select the project and version, then record the business question to answer.
- Create object types, attributes and object type relationships.
- Check whether the model covers the modeling goal.
- Export the ontology as TTL and upload the sample business document.
- Create and run an unstructured extraction task, then check its execution logs.
- Review the extraction results and publish them once confirmed.
Goal of this walkthrough
Model the statement “a purchase order specifies a supplier,” then use the sample document to verify the relationship between order PO-001 and “Qiantong Sample Supplier.” You create the object types and relationship manually; the actual order and supplier entities are produced during extraction.
1. Log in and create a project
Open your deployed qOntology URL and log in with the account assigned by your administrator. Go to Basic Management > Project Management, click Add, and enter the following sample values. Complete the remaining fields as required by the page, then click OK.
| Field | Sample value |
|---|---|
| Project name | Purchasing Relationship Demo |
| Project domain | Supply chain management |
| Namespace | https://example.com/ontology/purchasing |
| Included scope | Purchase orders, suppliers, and the relationship specifying a supplier for an order |
| Excluded scope | Payments, invoices, inventory and logistics |
| Description | A quick walkthrough of ontology modeling and document extraction |
| Status | Enabled |
| Initial version | v1.0.0 |
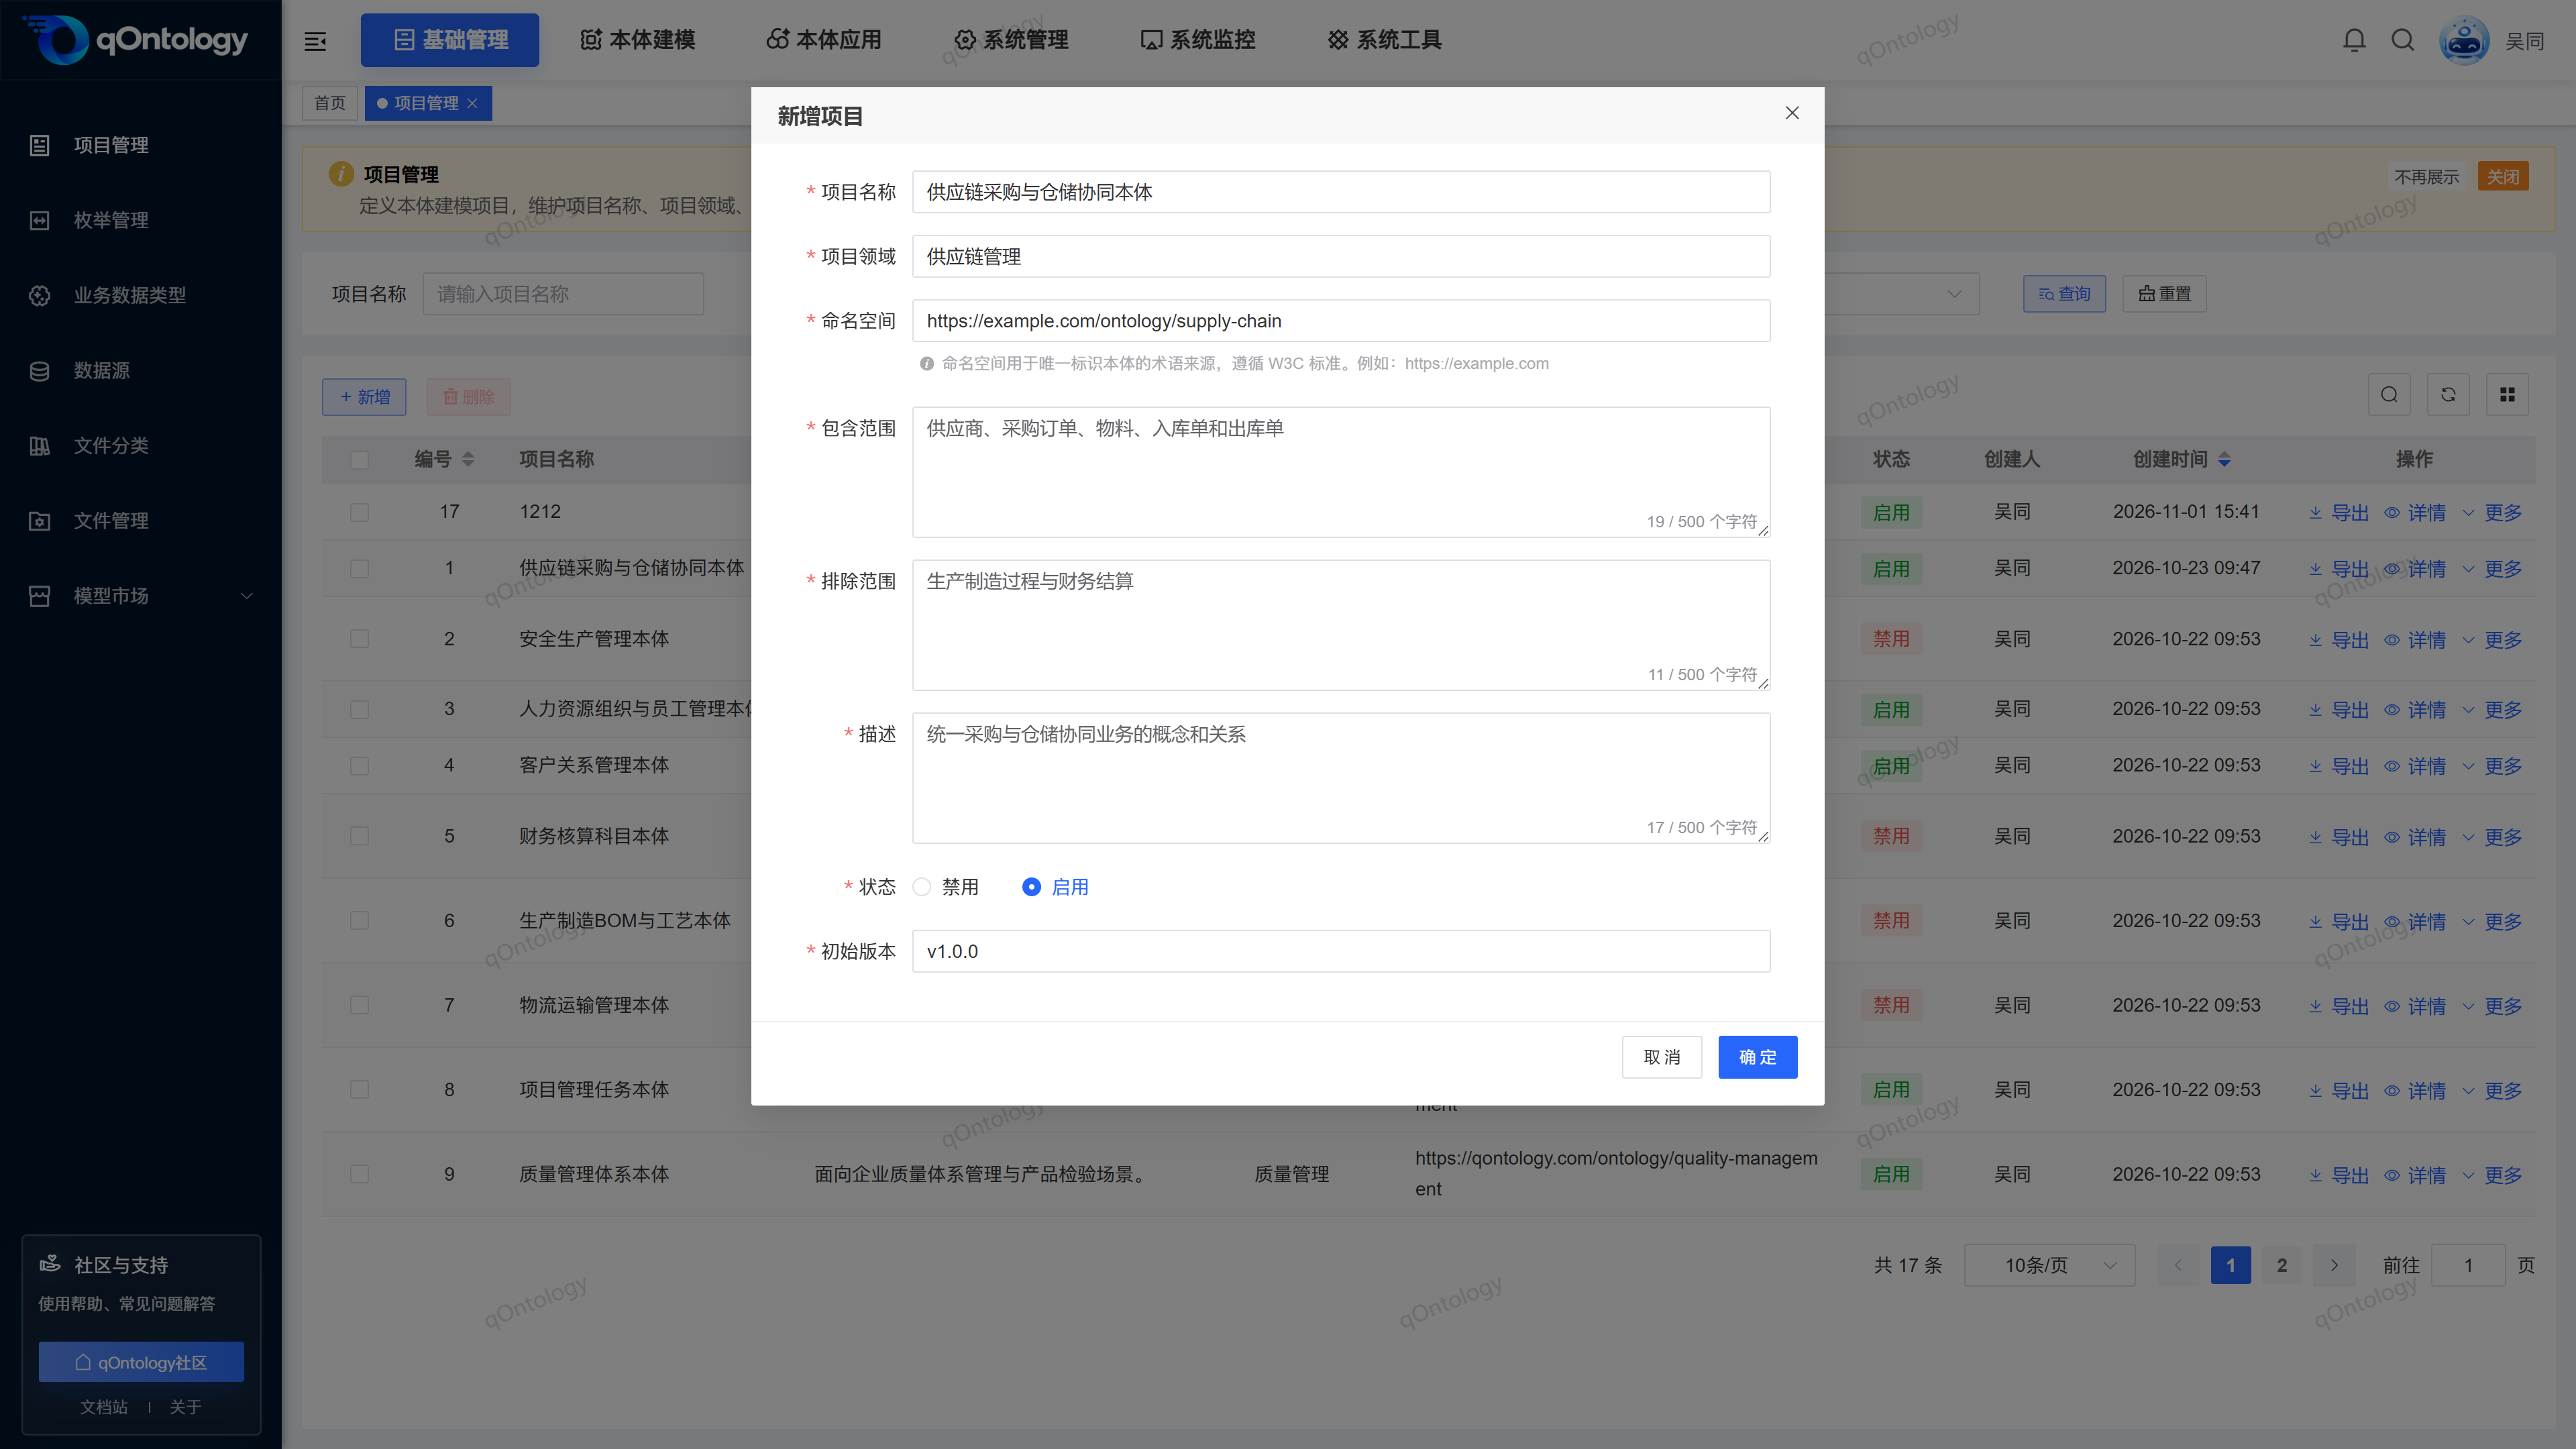
Check: The project appears in the list with its initial version. Open Ontology Modeling and select “Purchasing Relationship Demo” and its version at the top. Perform all subsequent modeling steps in this context.
For detailed instructions, see Project Management.
2. Create a modeling goal
Go to Ontology Modeling > Modeling Goals, click Add, enter the business question, and save.
| Field | Sample value |
|---|---|
| Goal question | Which supplier is specified by each purchase order? |
| Question source | Purchasing workflow demonstration requirements |
| Business scenario | Find a supplier from a purchase order |
| Acceptance criteria | The model contains Purchase Order and Supplier object types, with a relationship directed from Purchase Order to Supplier |
| Priority | High |
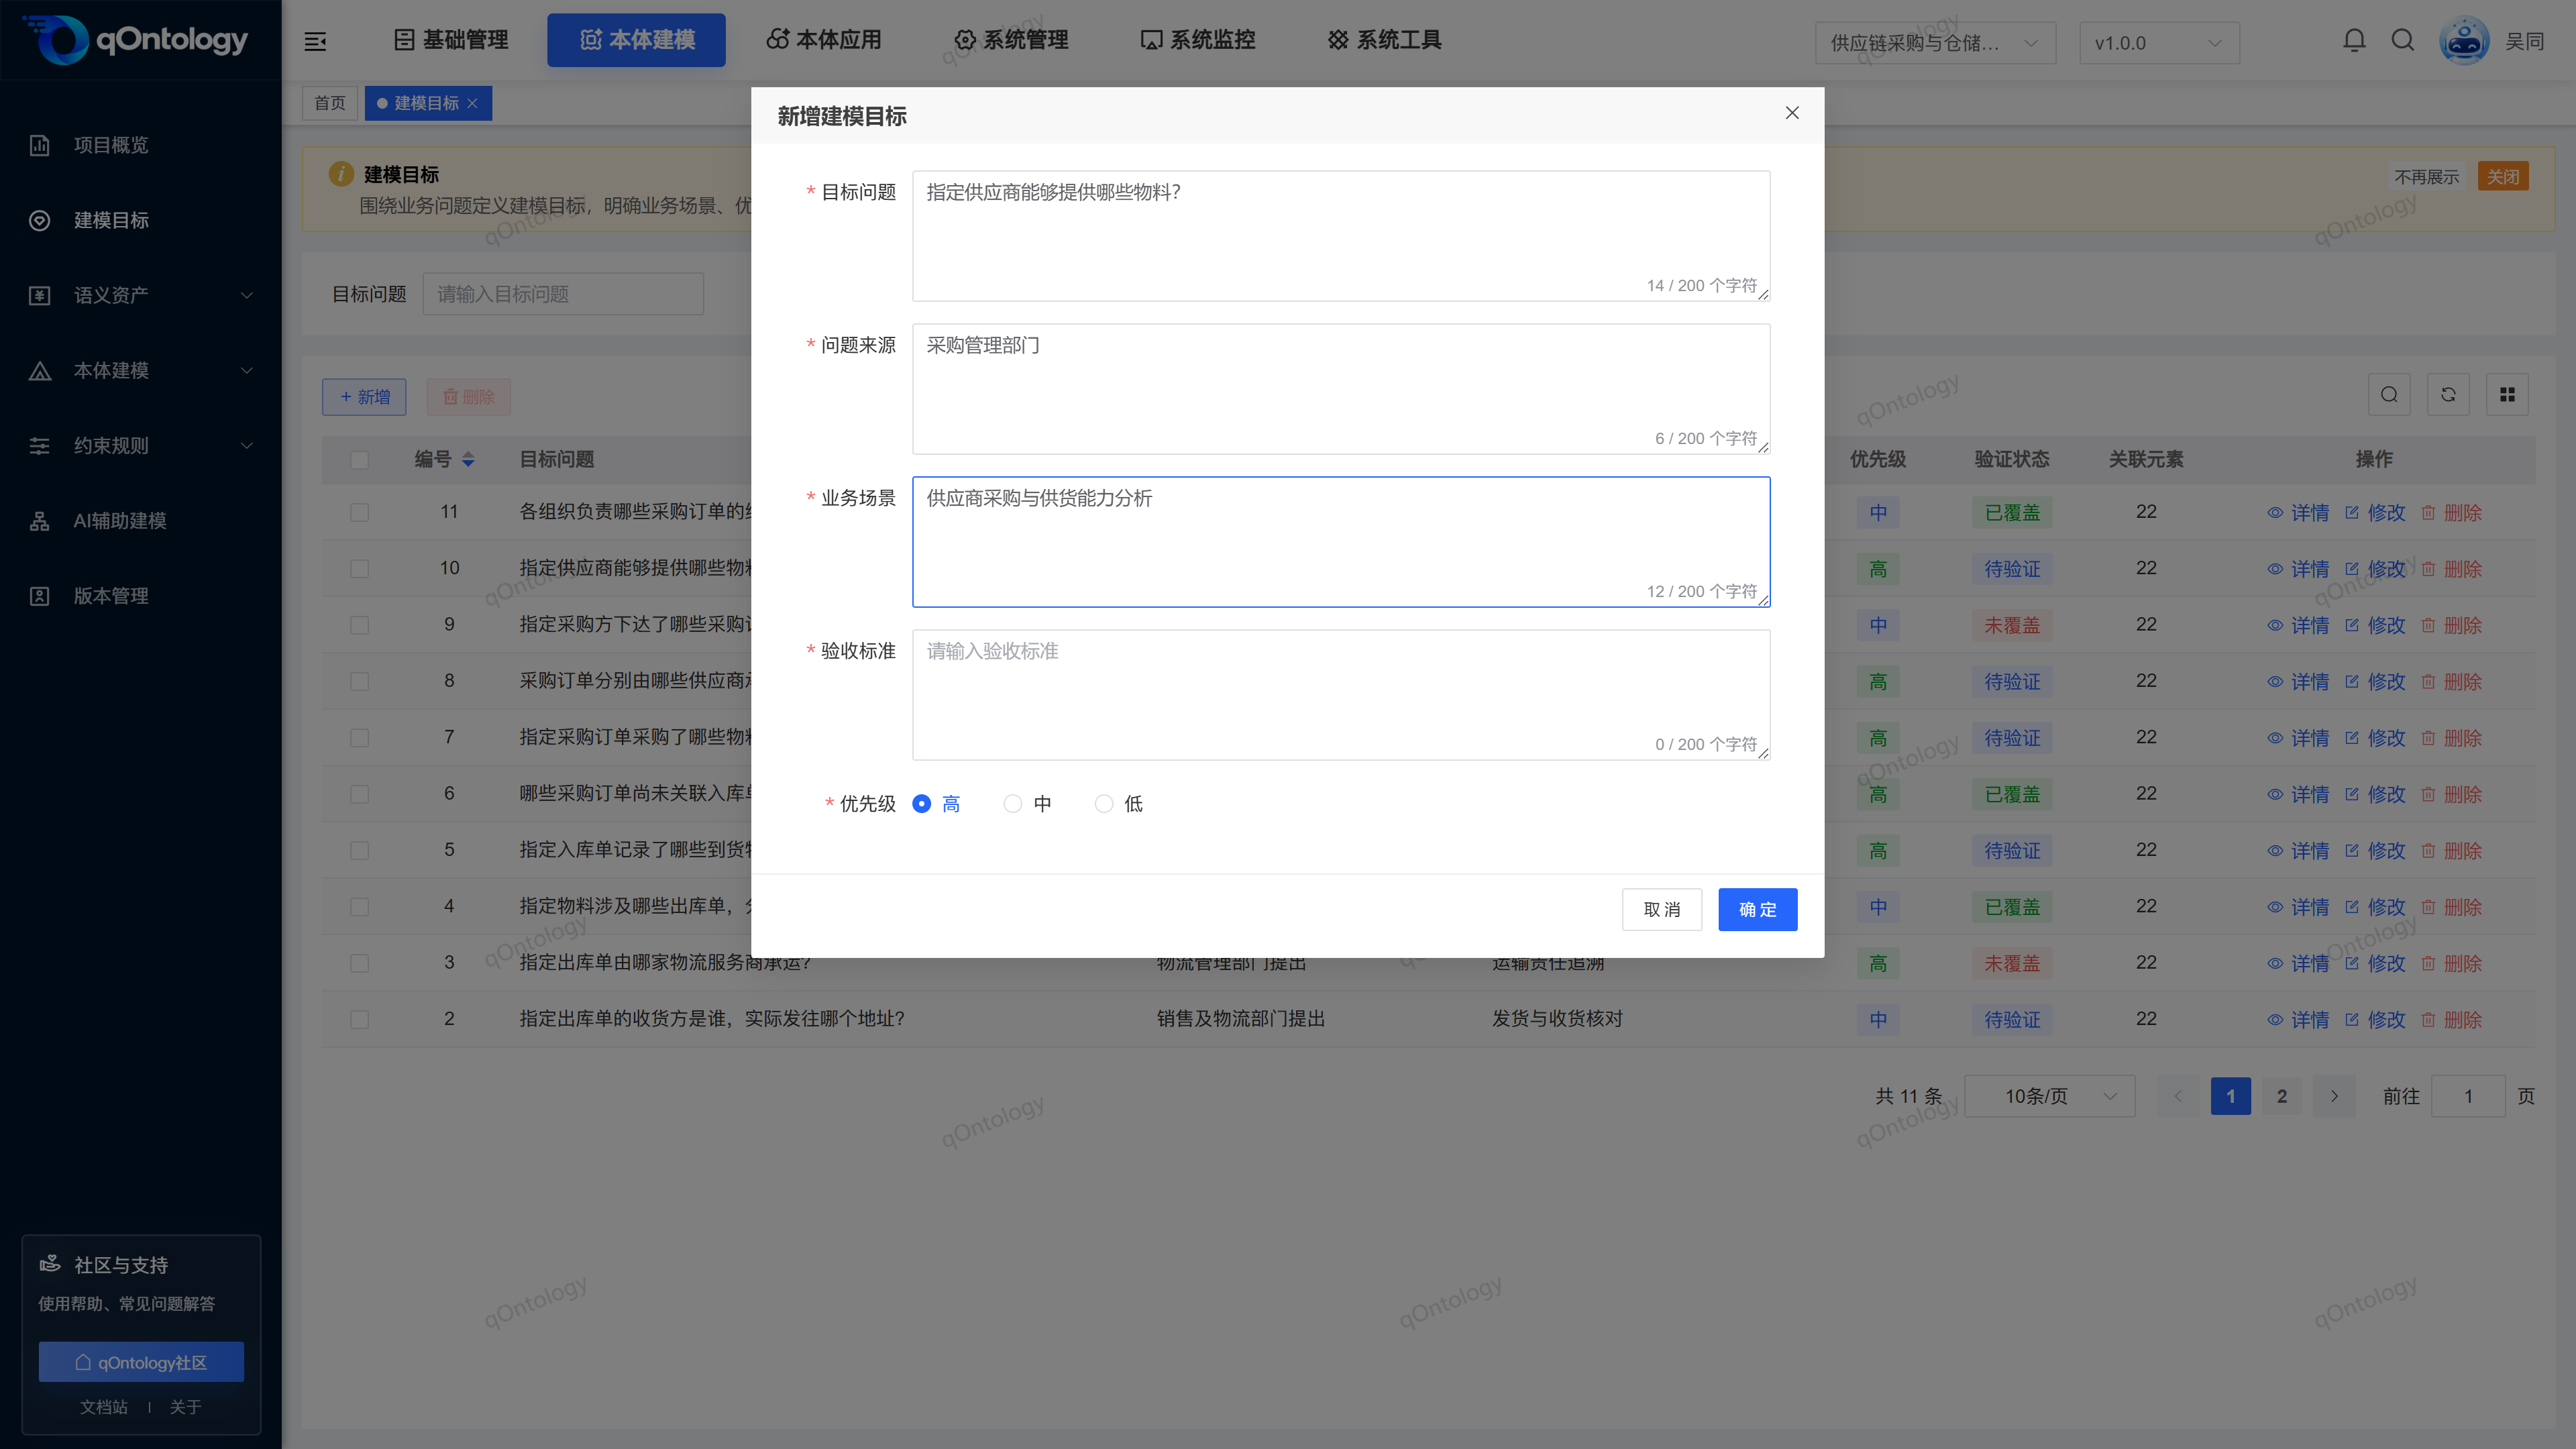
Check: The goal appears in the list. Keep it for now; record the coverage conclusion after creating the objects and relationship.
3. Create object types and attributes
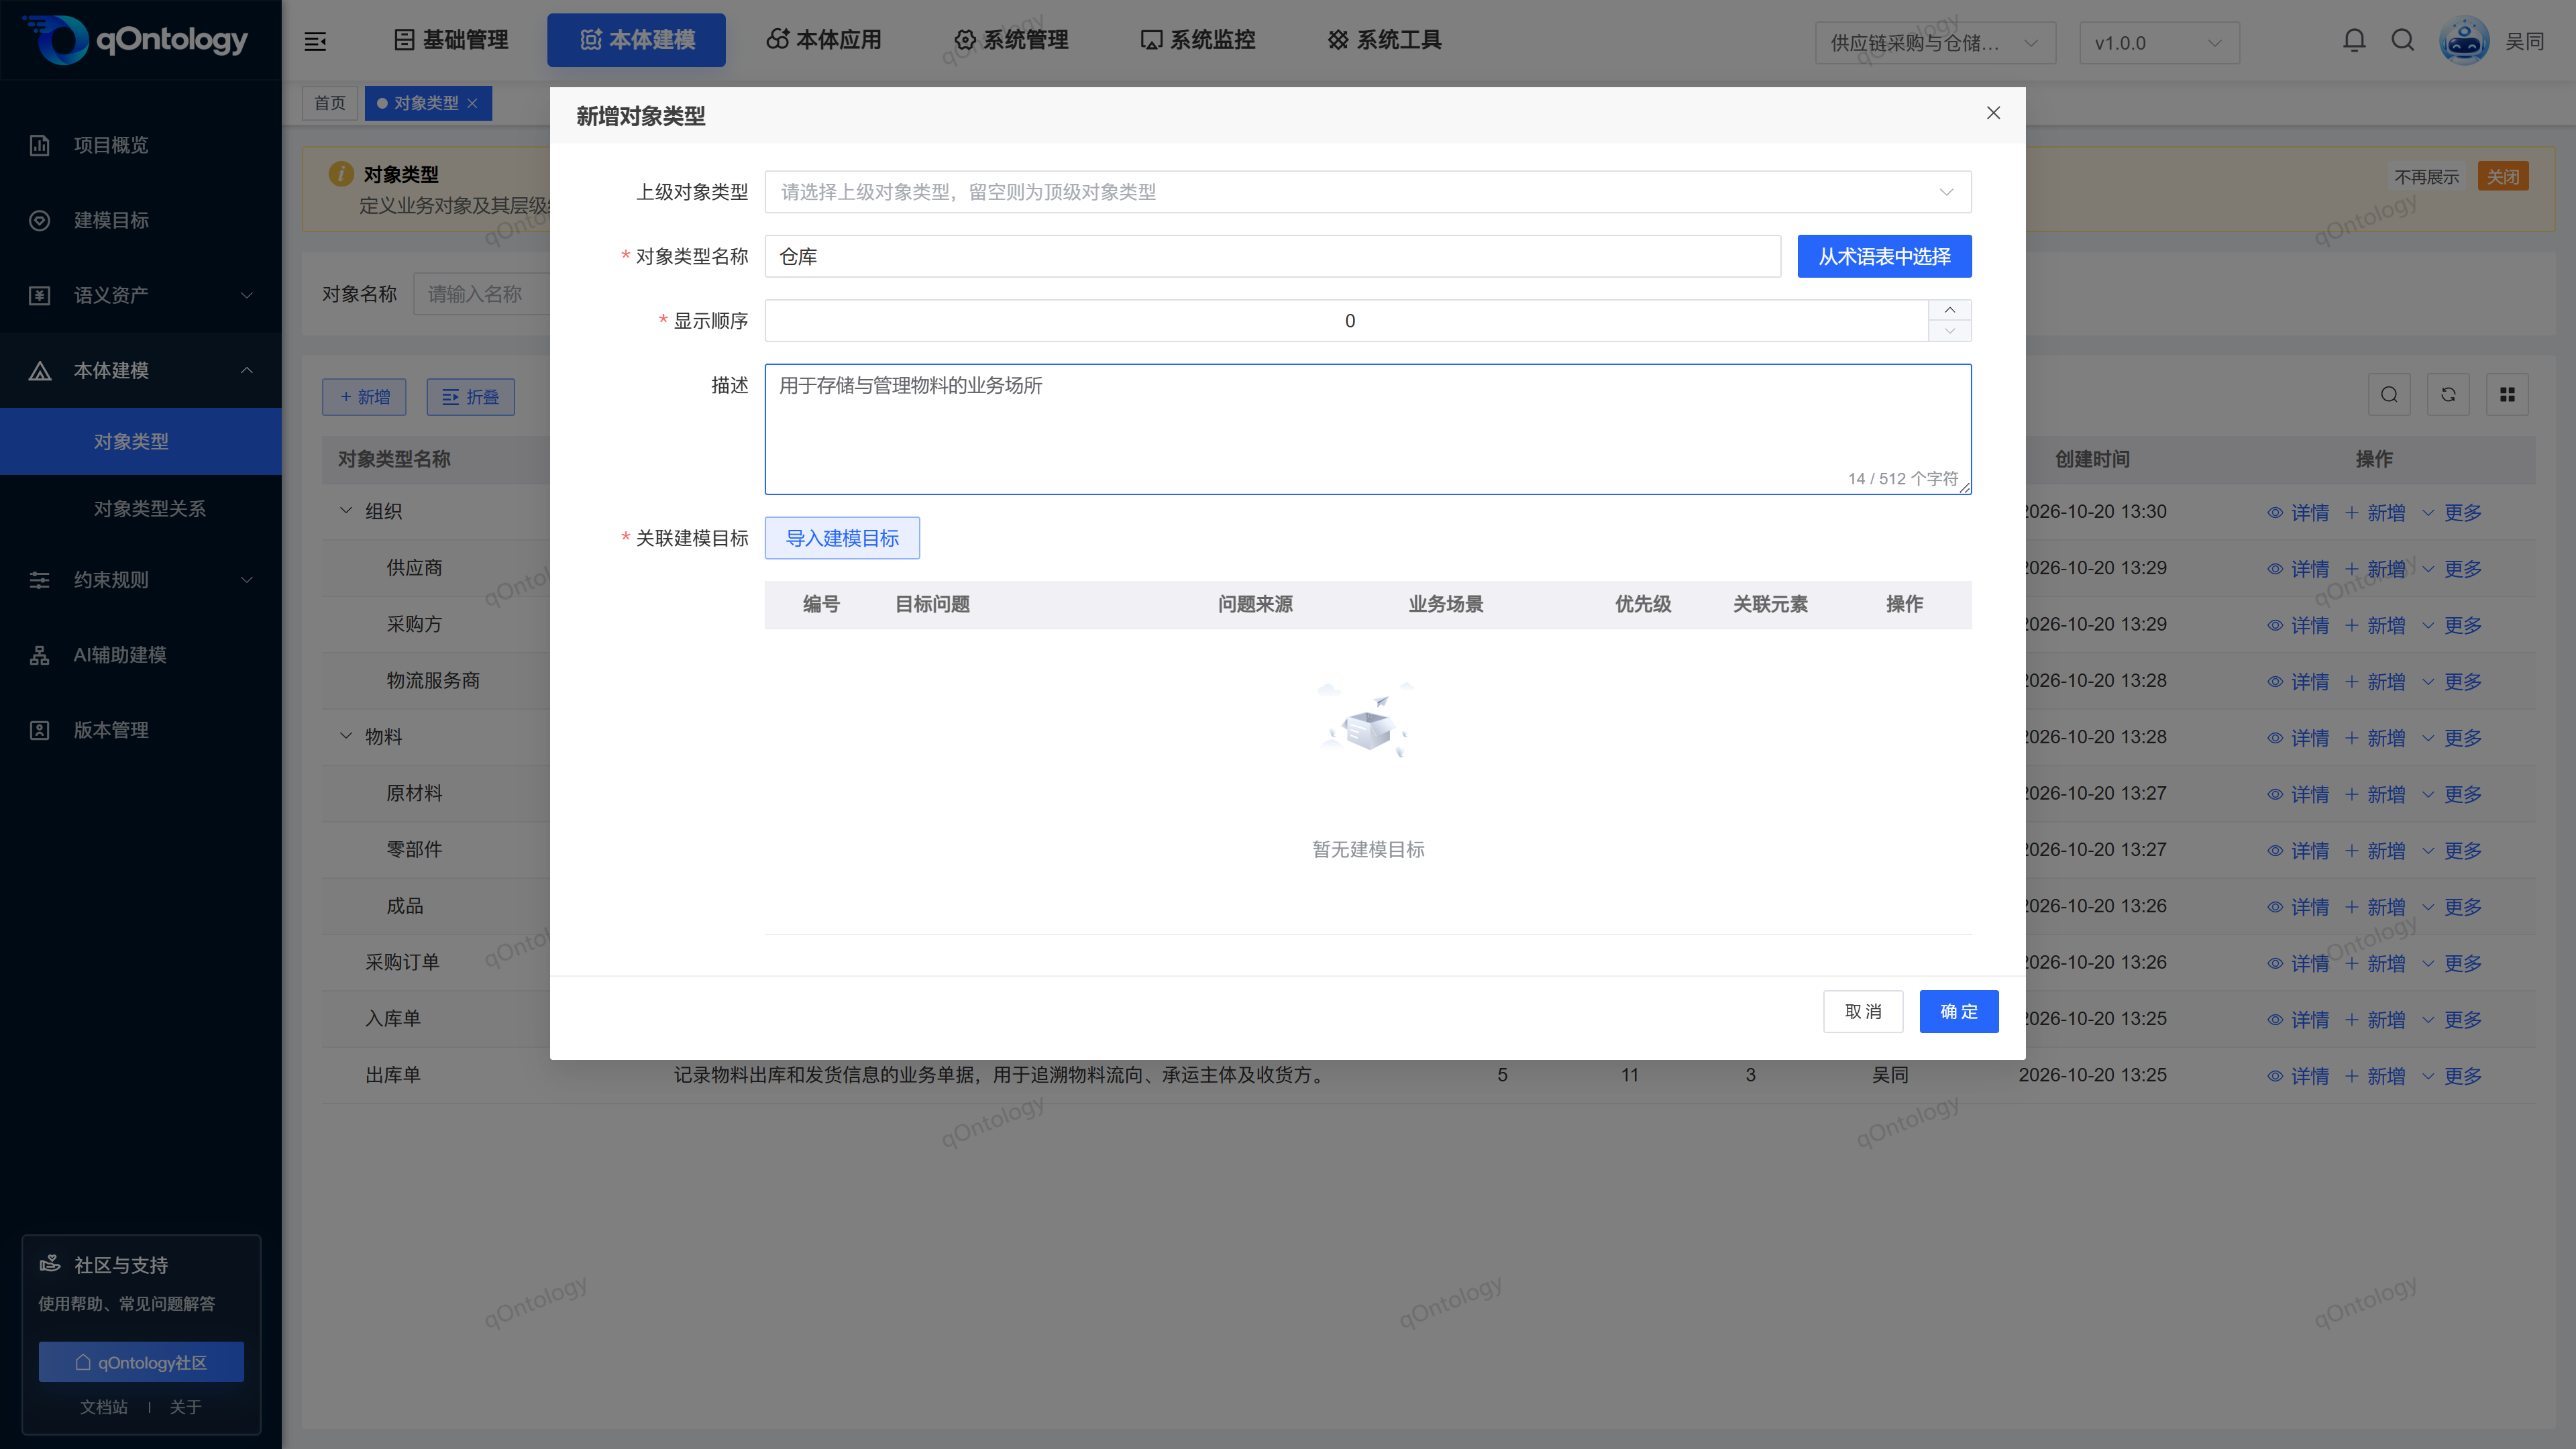
Go to Ontology Modeling > Ontology Modeling > Object Types, click Add, and create two top-level object types: “Purchase Order” and “Supplier.”
For each type, enter its name, display order and description. Use Import Modeling Goals to select the question from the previous step, then click OK. No parent object type is needed for this example.
Open Details for each type, go to Object Type Attributes, and click Add to create the attributes below. Select the string type under Basic Data Type, and complete the remaining parameters as required by the page.
| Object type | Attribute name | Attribute code | Basic data type |
|---|---|---|---|
| Purchase Order | Order Number | orderNo | String |
| Supplier | Supplier Name | supplierName | String |
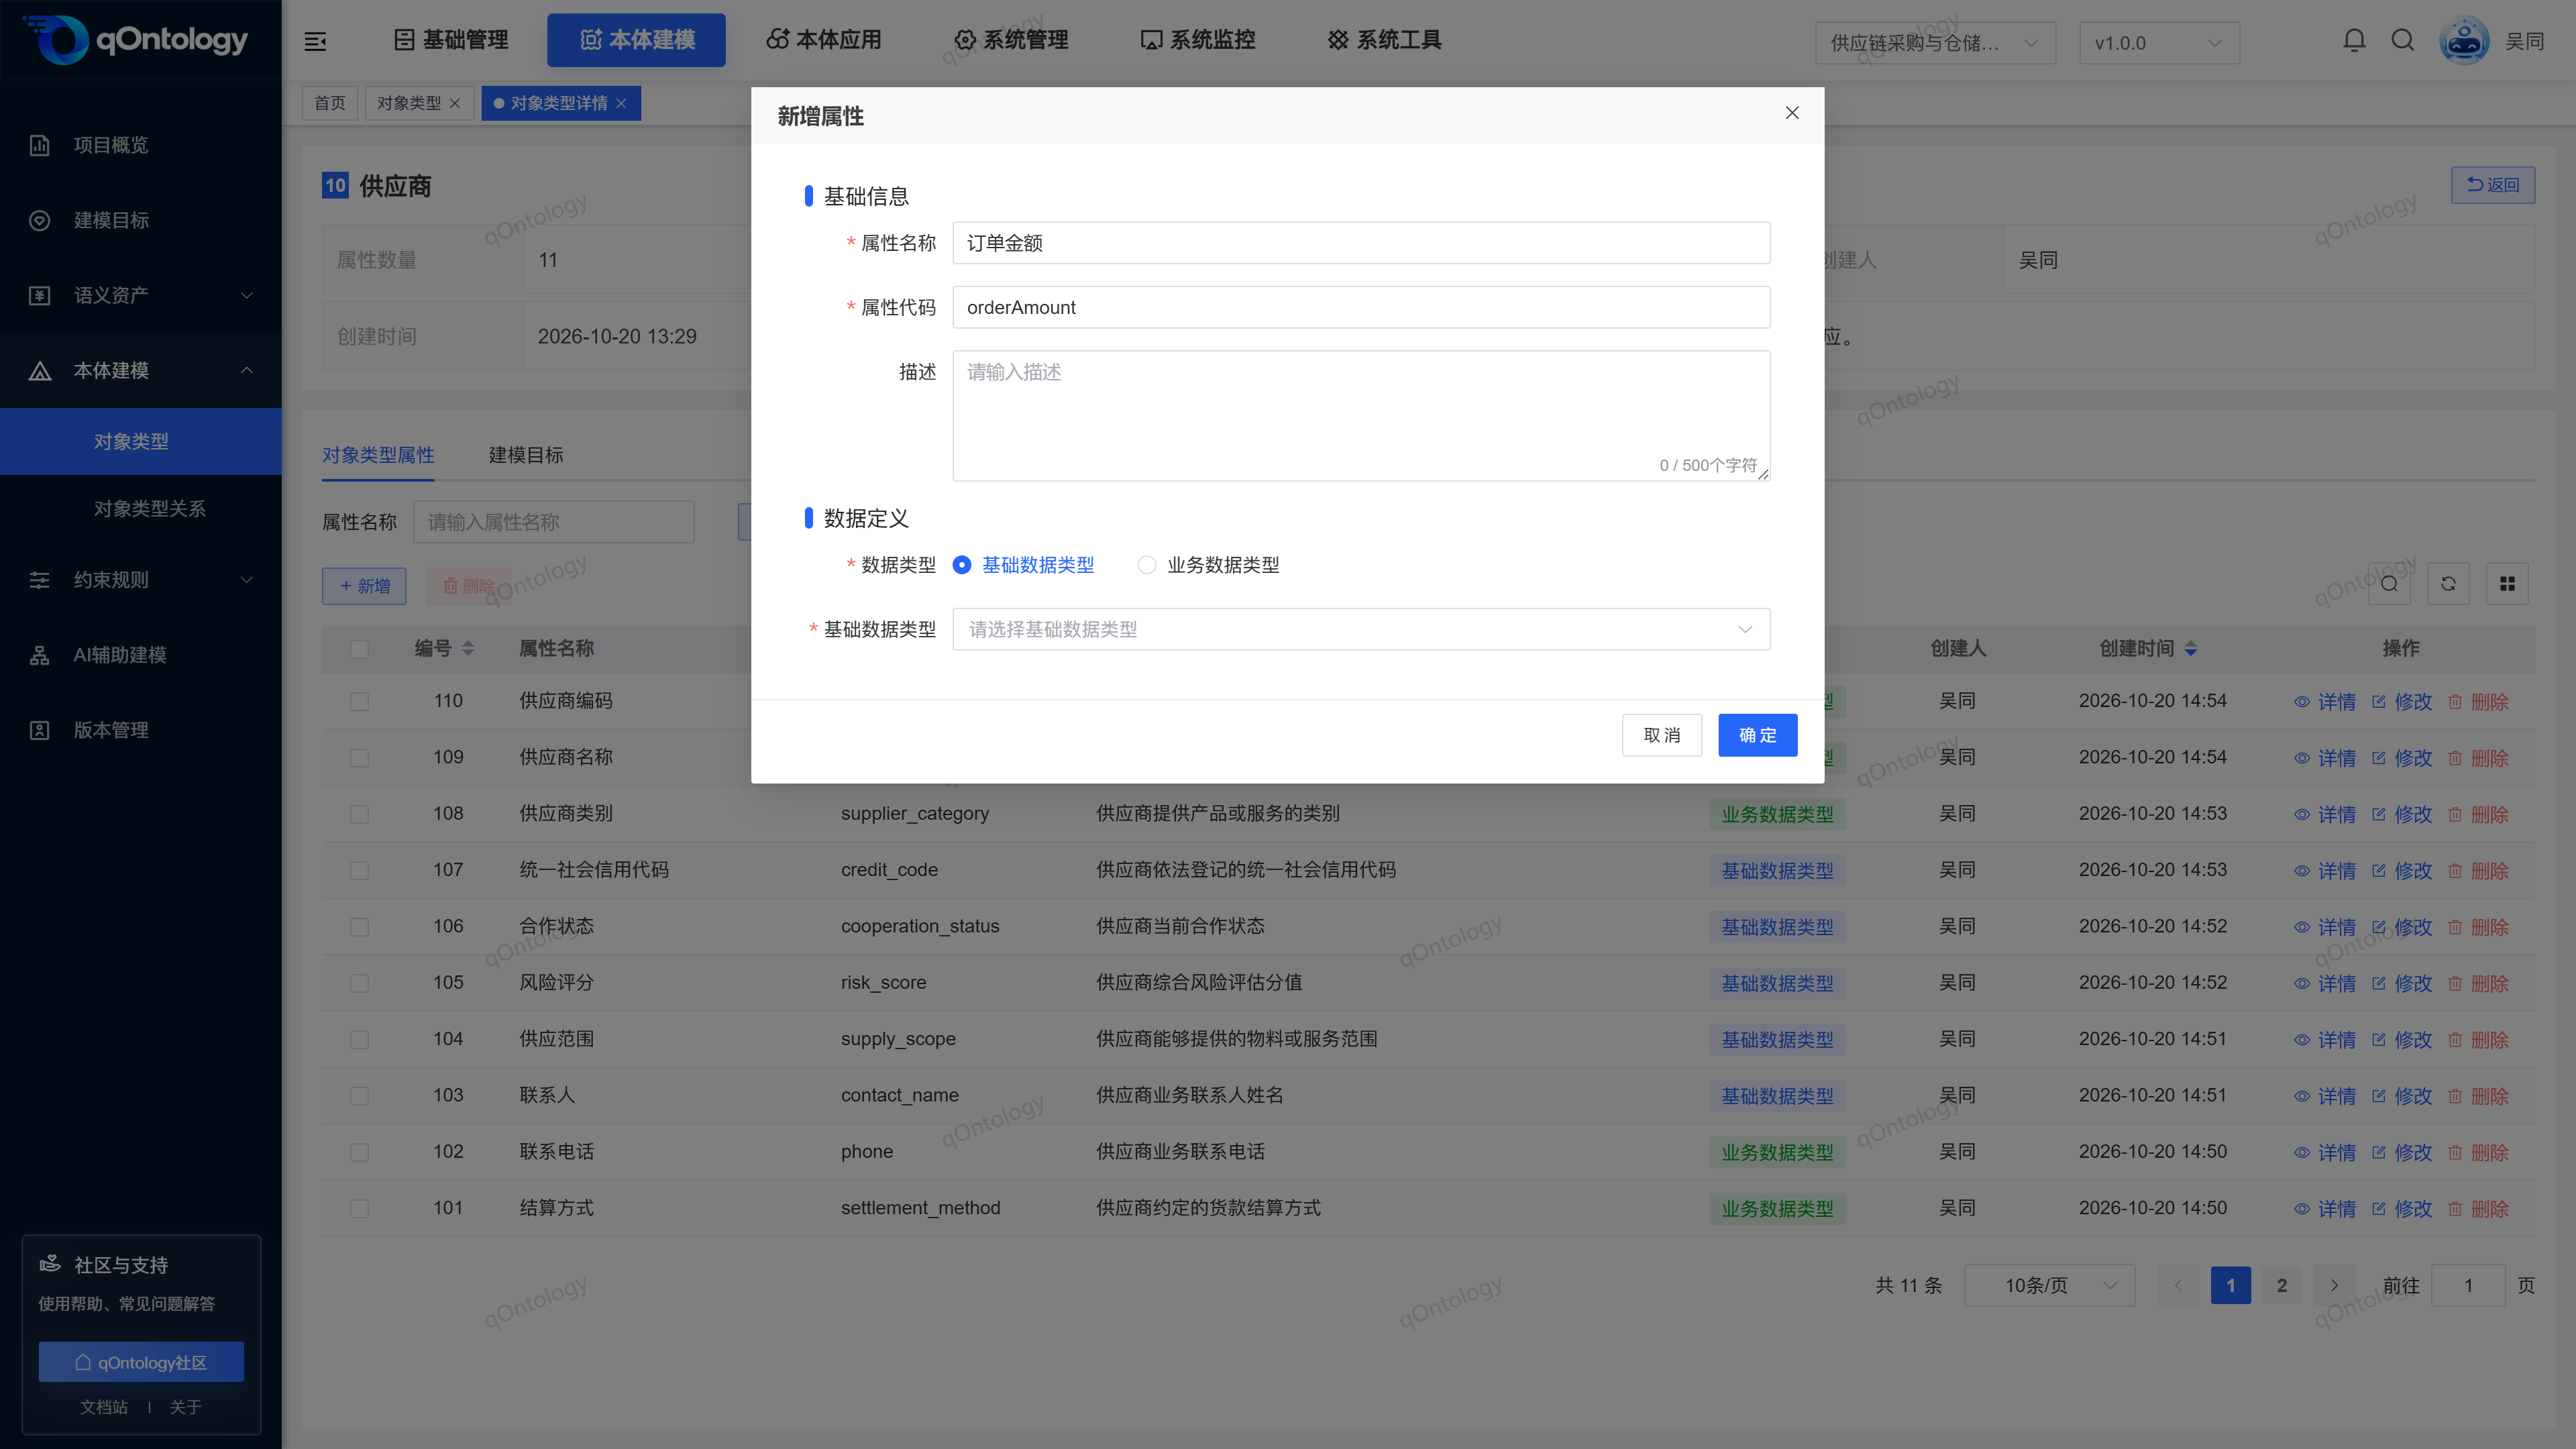
Check: Both types appear in the object type list, and their details show the attributes you added. Attribute codes must start with a letter and contain only letters, digits and underscores.
To standardize domain terminology, first maintain definitions under Ontology Modeling > Semantic Assets > Terminology Management, then use Select from Glossary when adding an object type. See Object Types for full instructions.
4. Define the relationship and check the goal
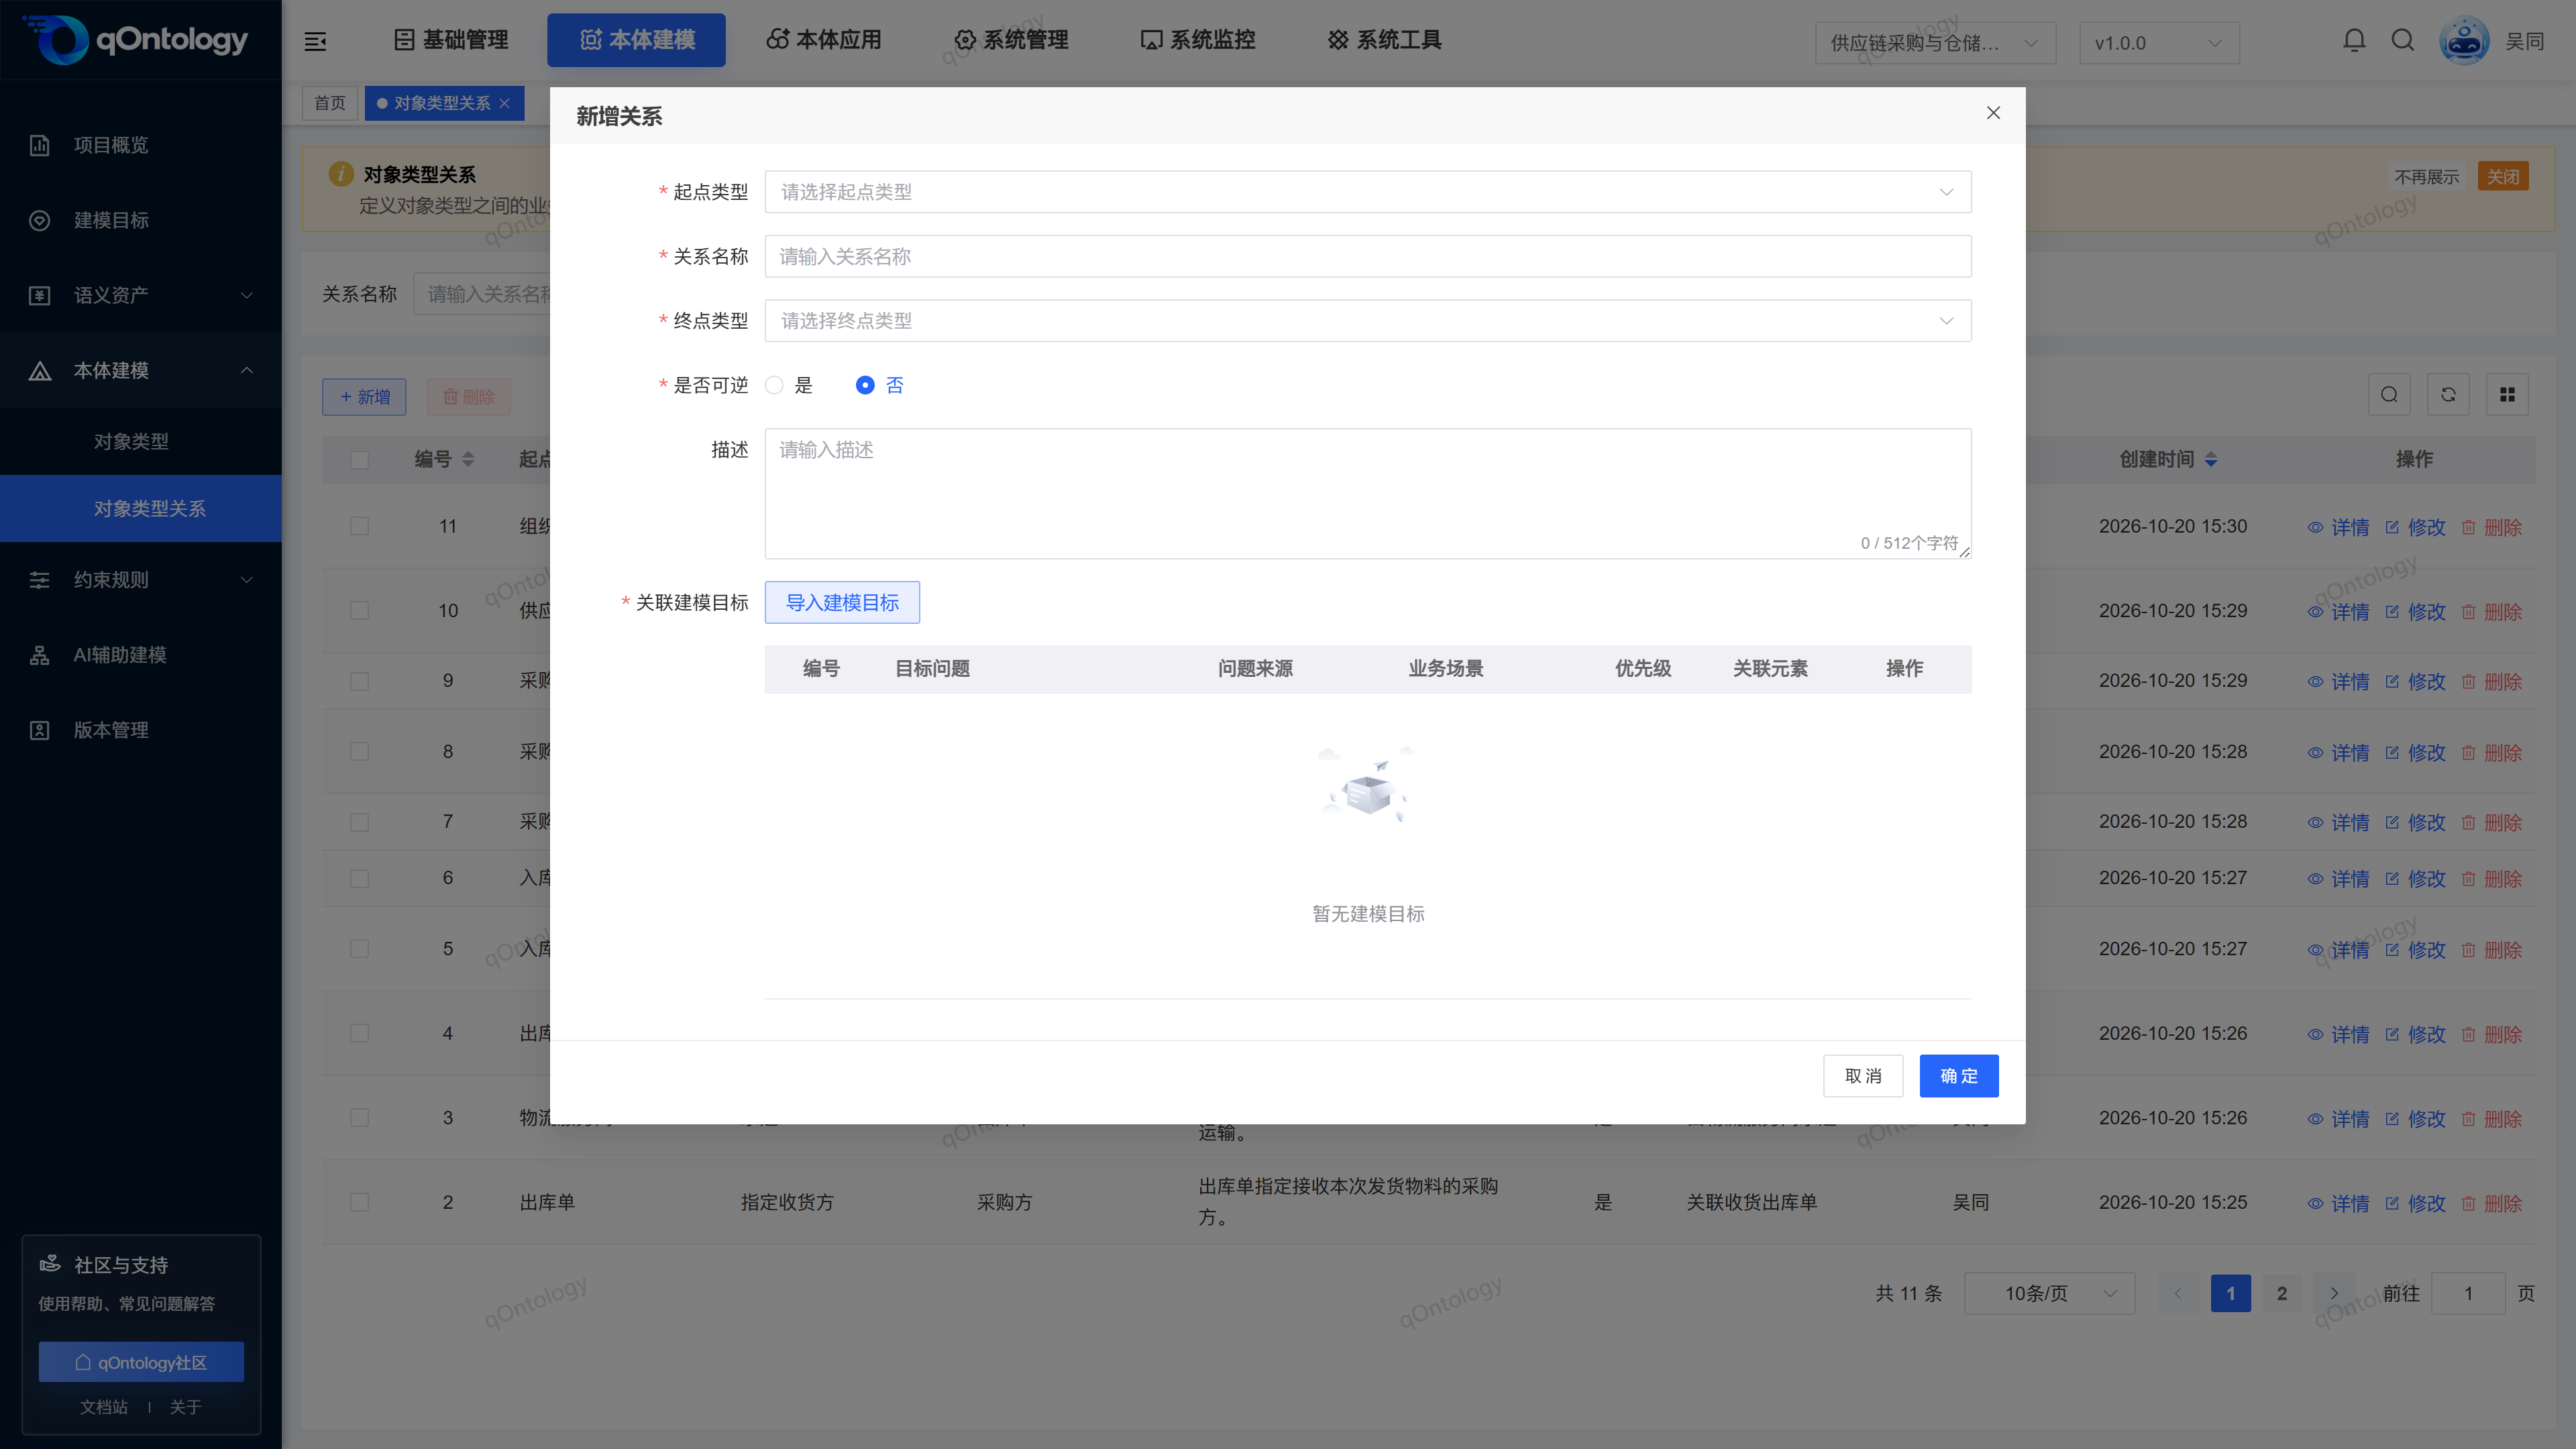
Go to Ontology Modeling > Ontology Modeling > Object Type Relationships and click Add:
- Select “Purchase Order” as the source type.
- Enter “Specifies Supplier” as the relationship name.
- Select “Supplier” as the target type.
- Set Reversible to No.
- Use Import Modeling Goals to link the question created in step 2.
- Click OK to save.
Return to Modeling Goals, open the goal's Details, and check the Object Types and Object Type Relationships tabs. Once both types and the “Specifies Supplier” relationship are linked, click Verify under Verification Tasks, select Covered, and enter an explanation before saving. For example: “Purchase Order, Supplier and the Specifies Supplier relationship have been created, allowing the model to express the supplier associated with an order.”
Check: The goal details link to the associated model elements and retain the verification record. The operator records this conclusion based on the acceptance criteria.
5. Prepare the ontology file and sample document
5.1 Export the ontology as TTL
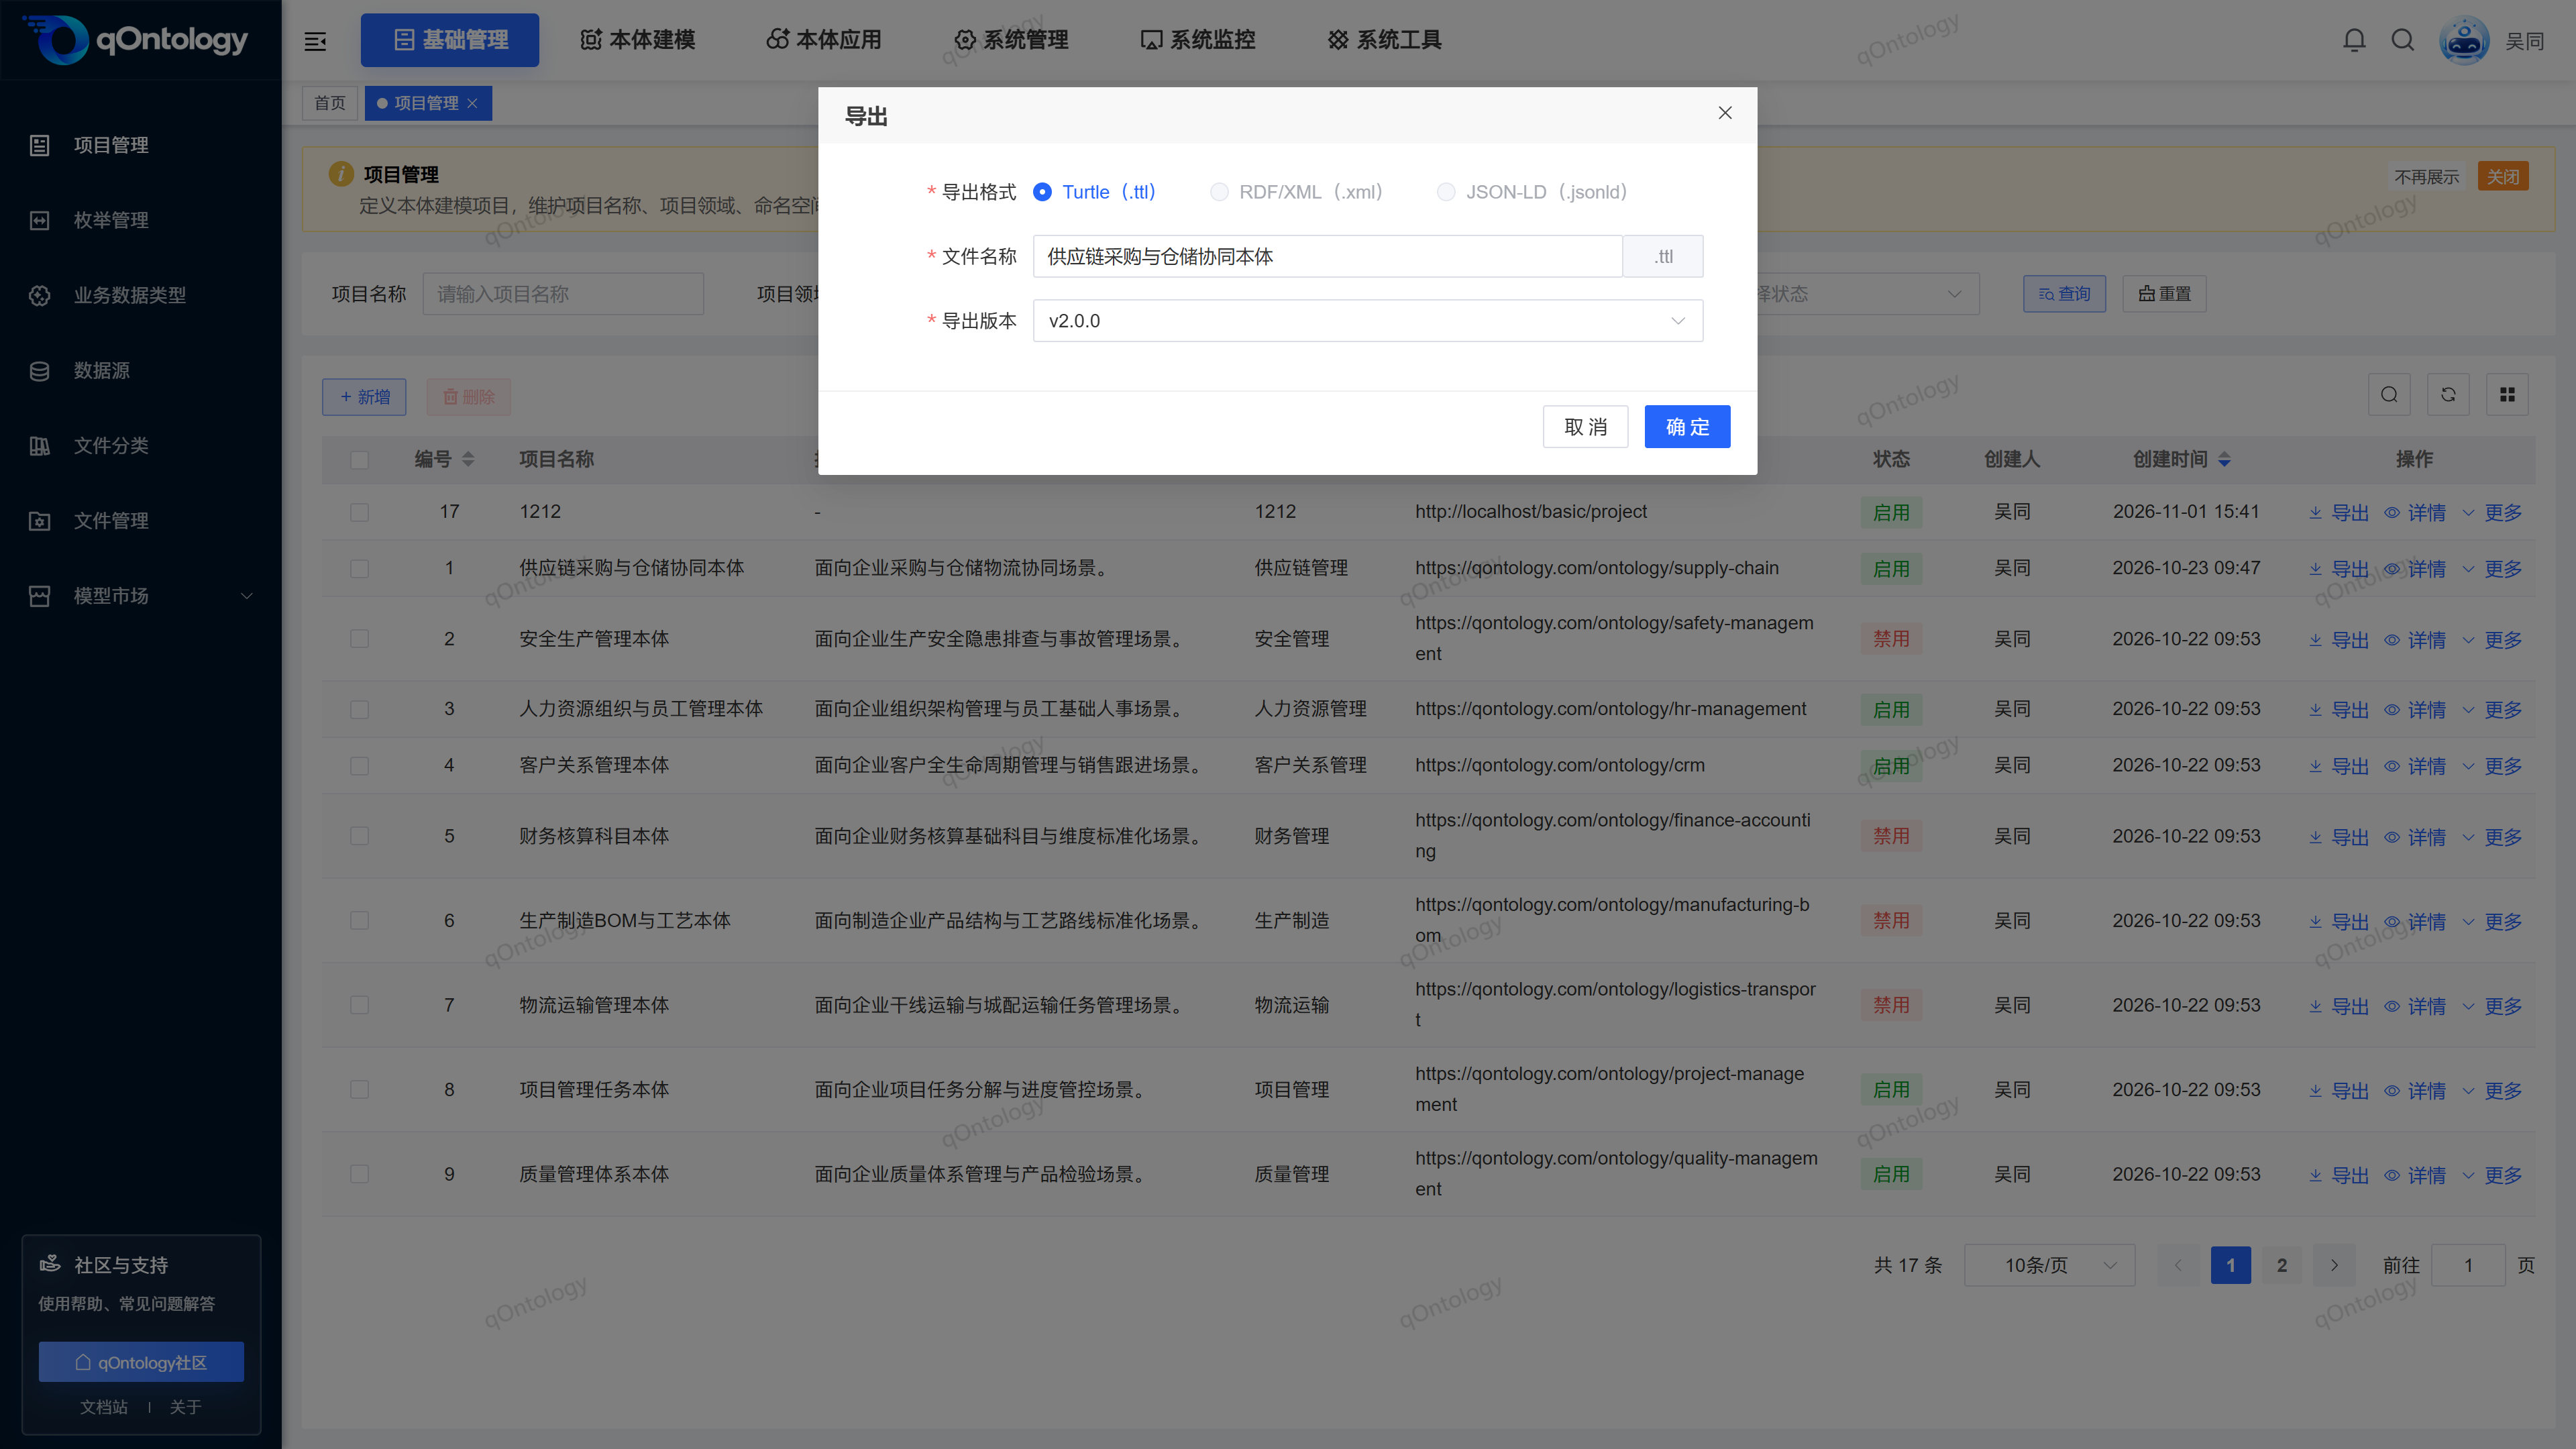
Return to Basic Management > Project Management and click Export on the sample project's row. Confirm that the format is Turtle (.ttl), select the version used for this walkthrough, and click OK. Keep the downloaded file.
5.2 Upload the business document
Create a local file named purchase-order-example.txt with the following content:
Purchase order PO-001 specifies Qiantong Sample Supplier as its supplier.
The Order Number of this purchase order is PO-001.
The Supplier Name of this supplier is Qiantong Sample Supplier.
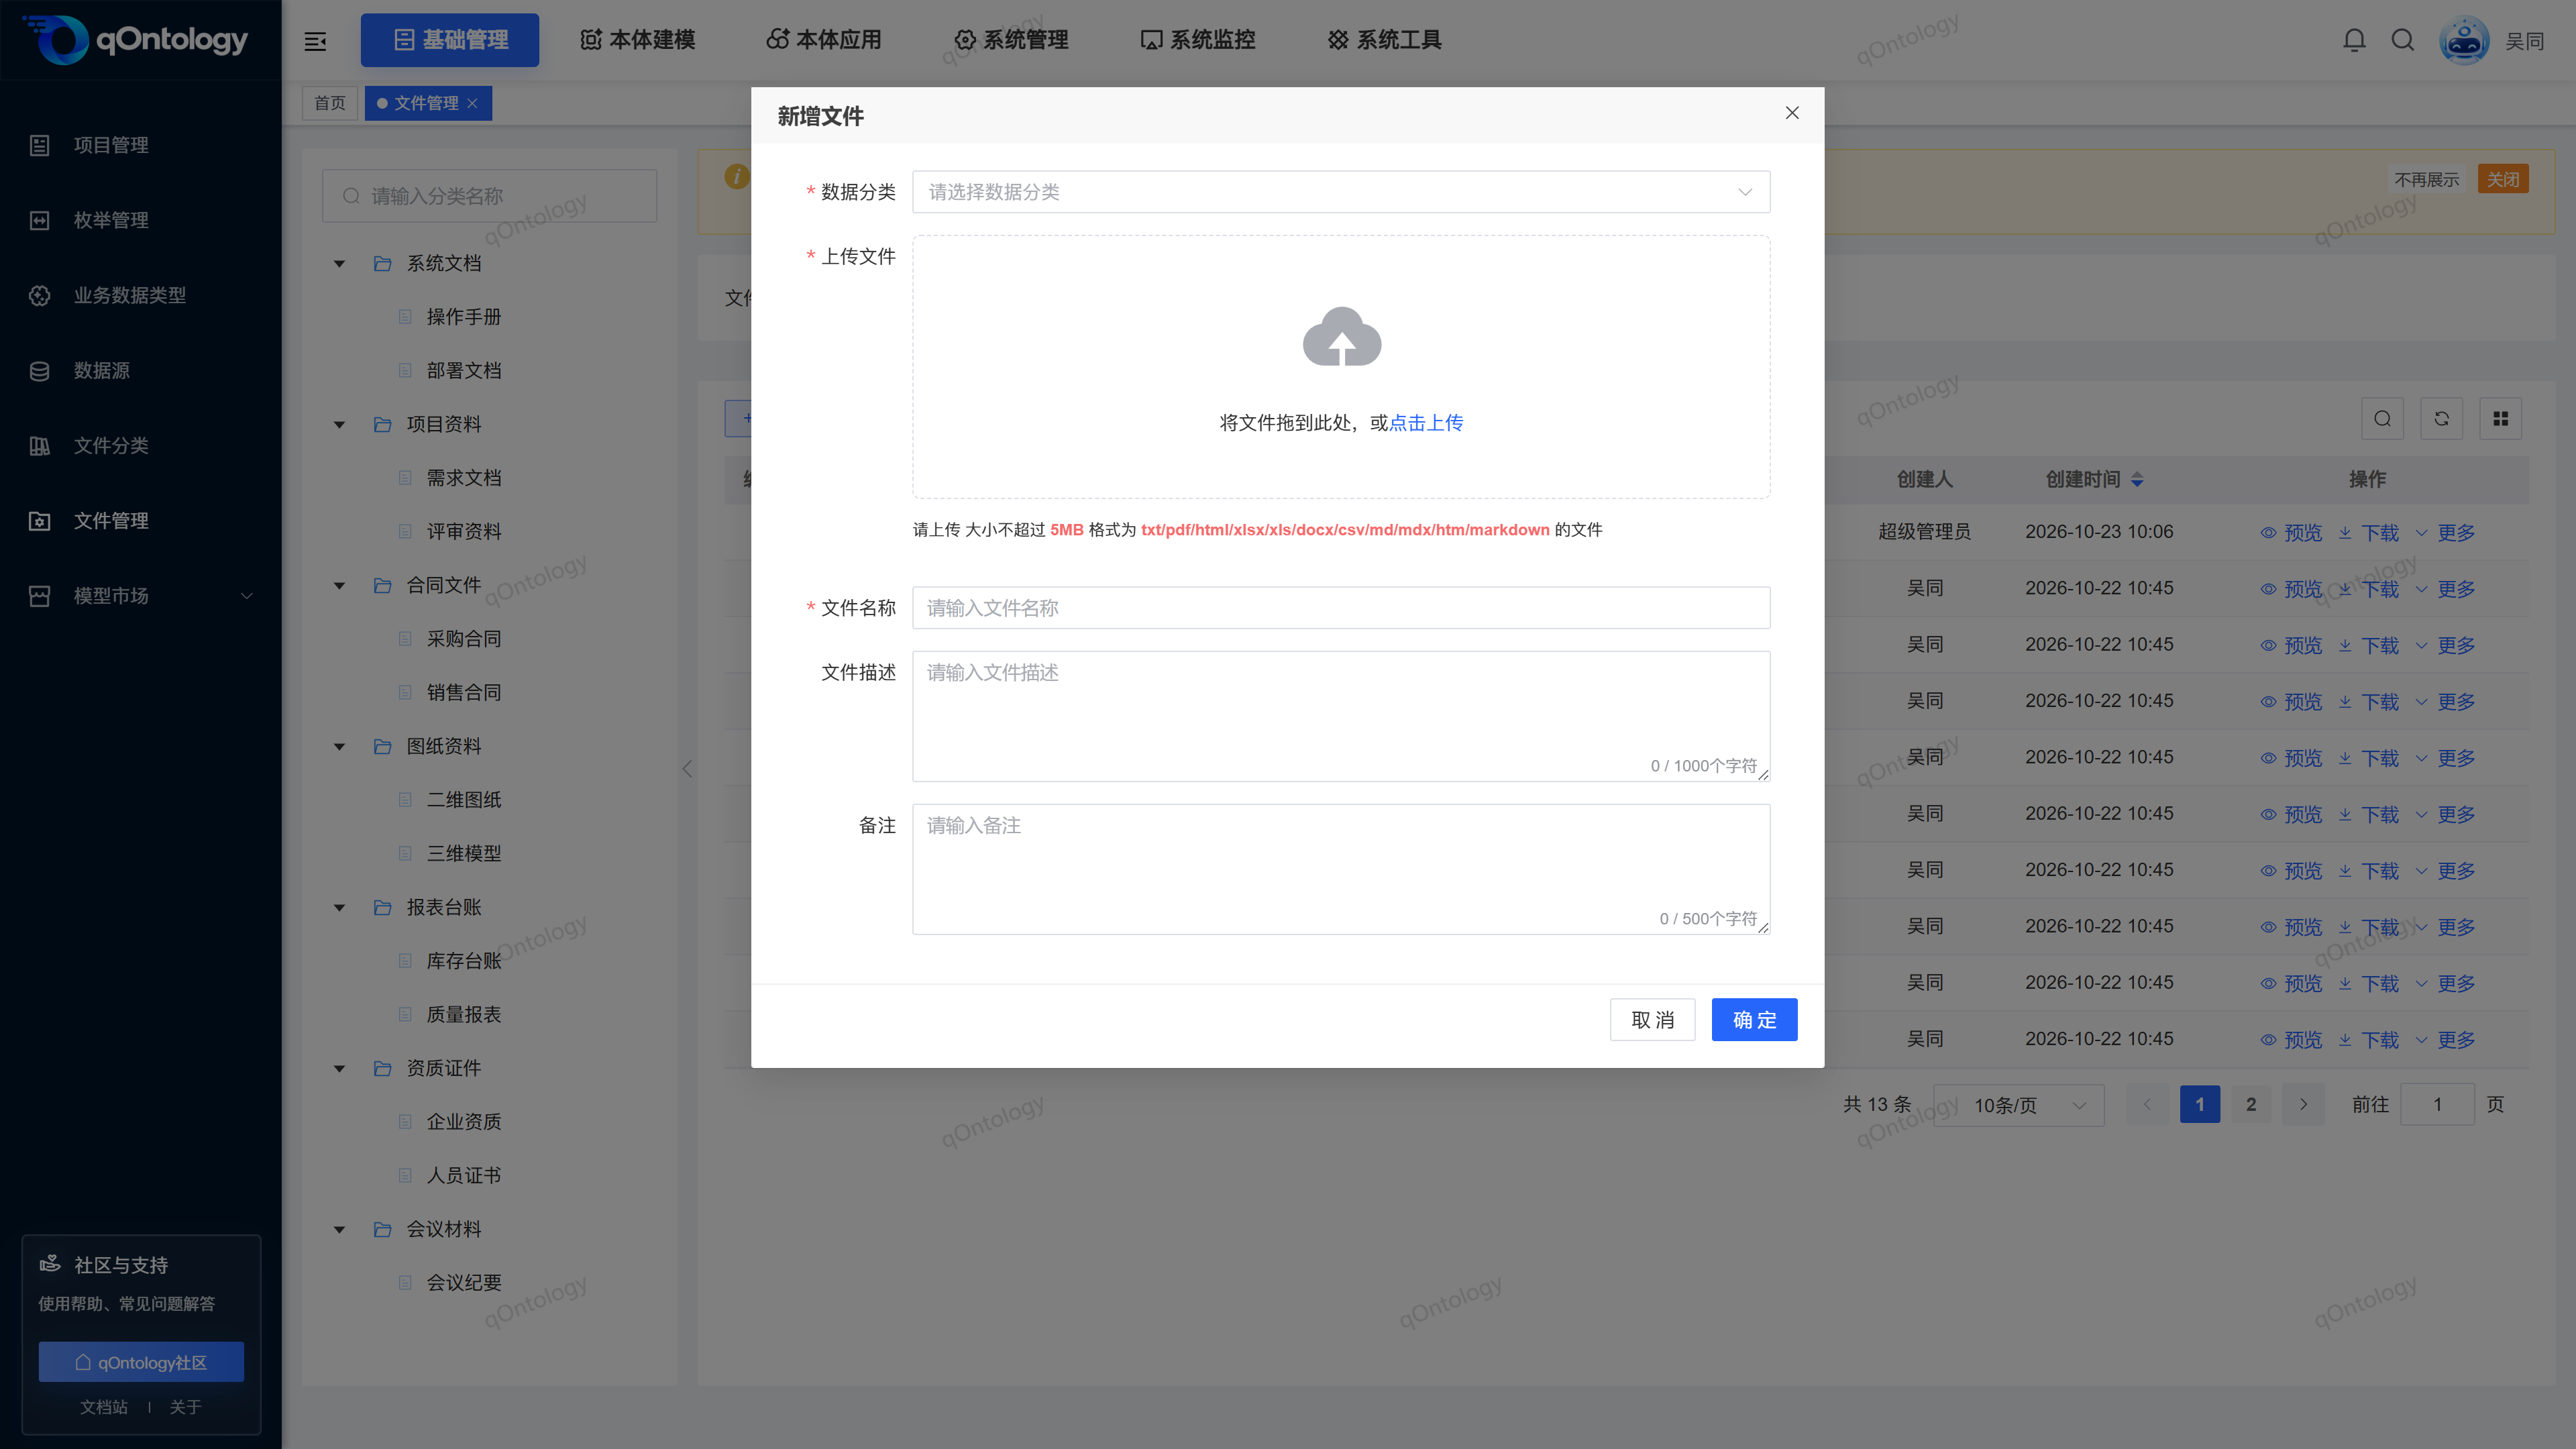
First create a “Quick Demo” category under Basic Management > File Categories. Then go to Basic Management > File Management, click Add, select that category, and upload the file. Wait for the upload to finish, check the filename, and click OK.
Check: The exported .ttl file is available locally, and you can find and preview the sample document in File Management. Uploading the document does not create an extraction task; continue with the next step.
6. Create and run an extraction task
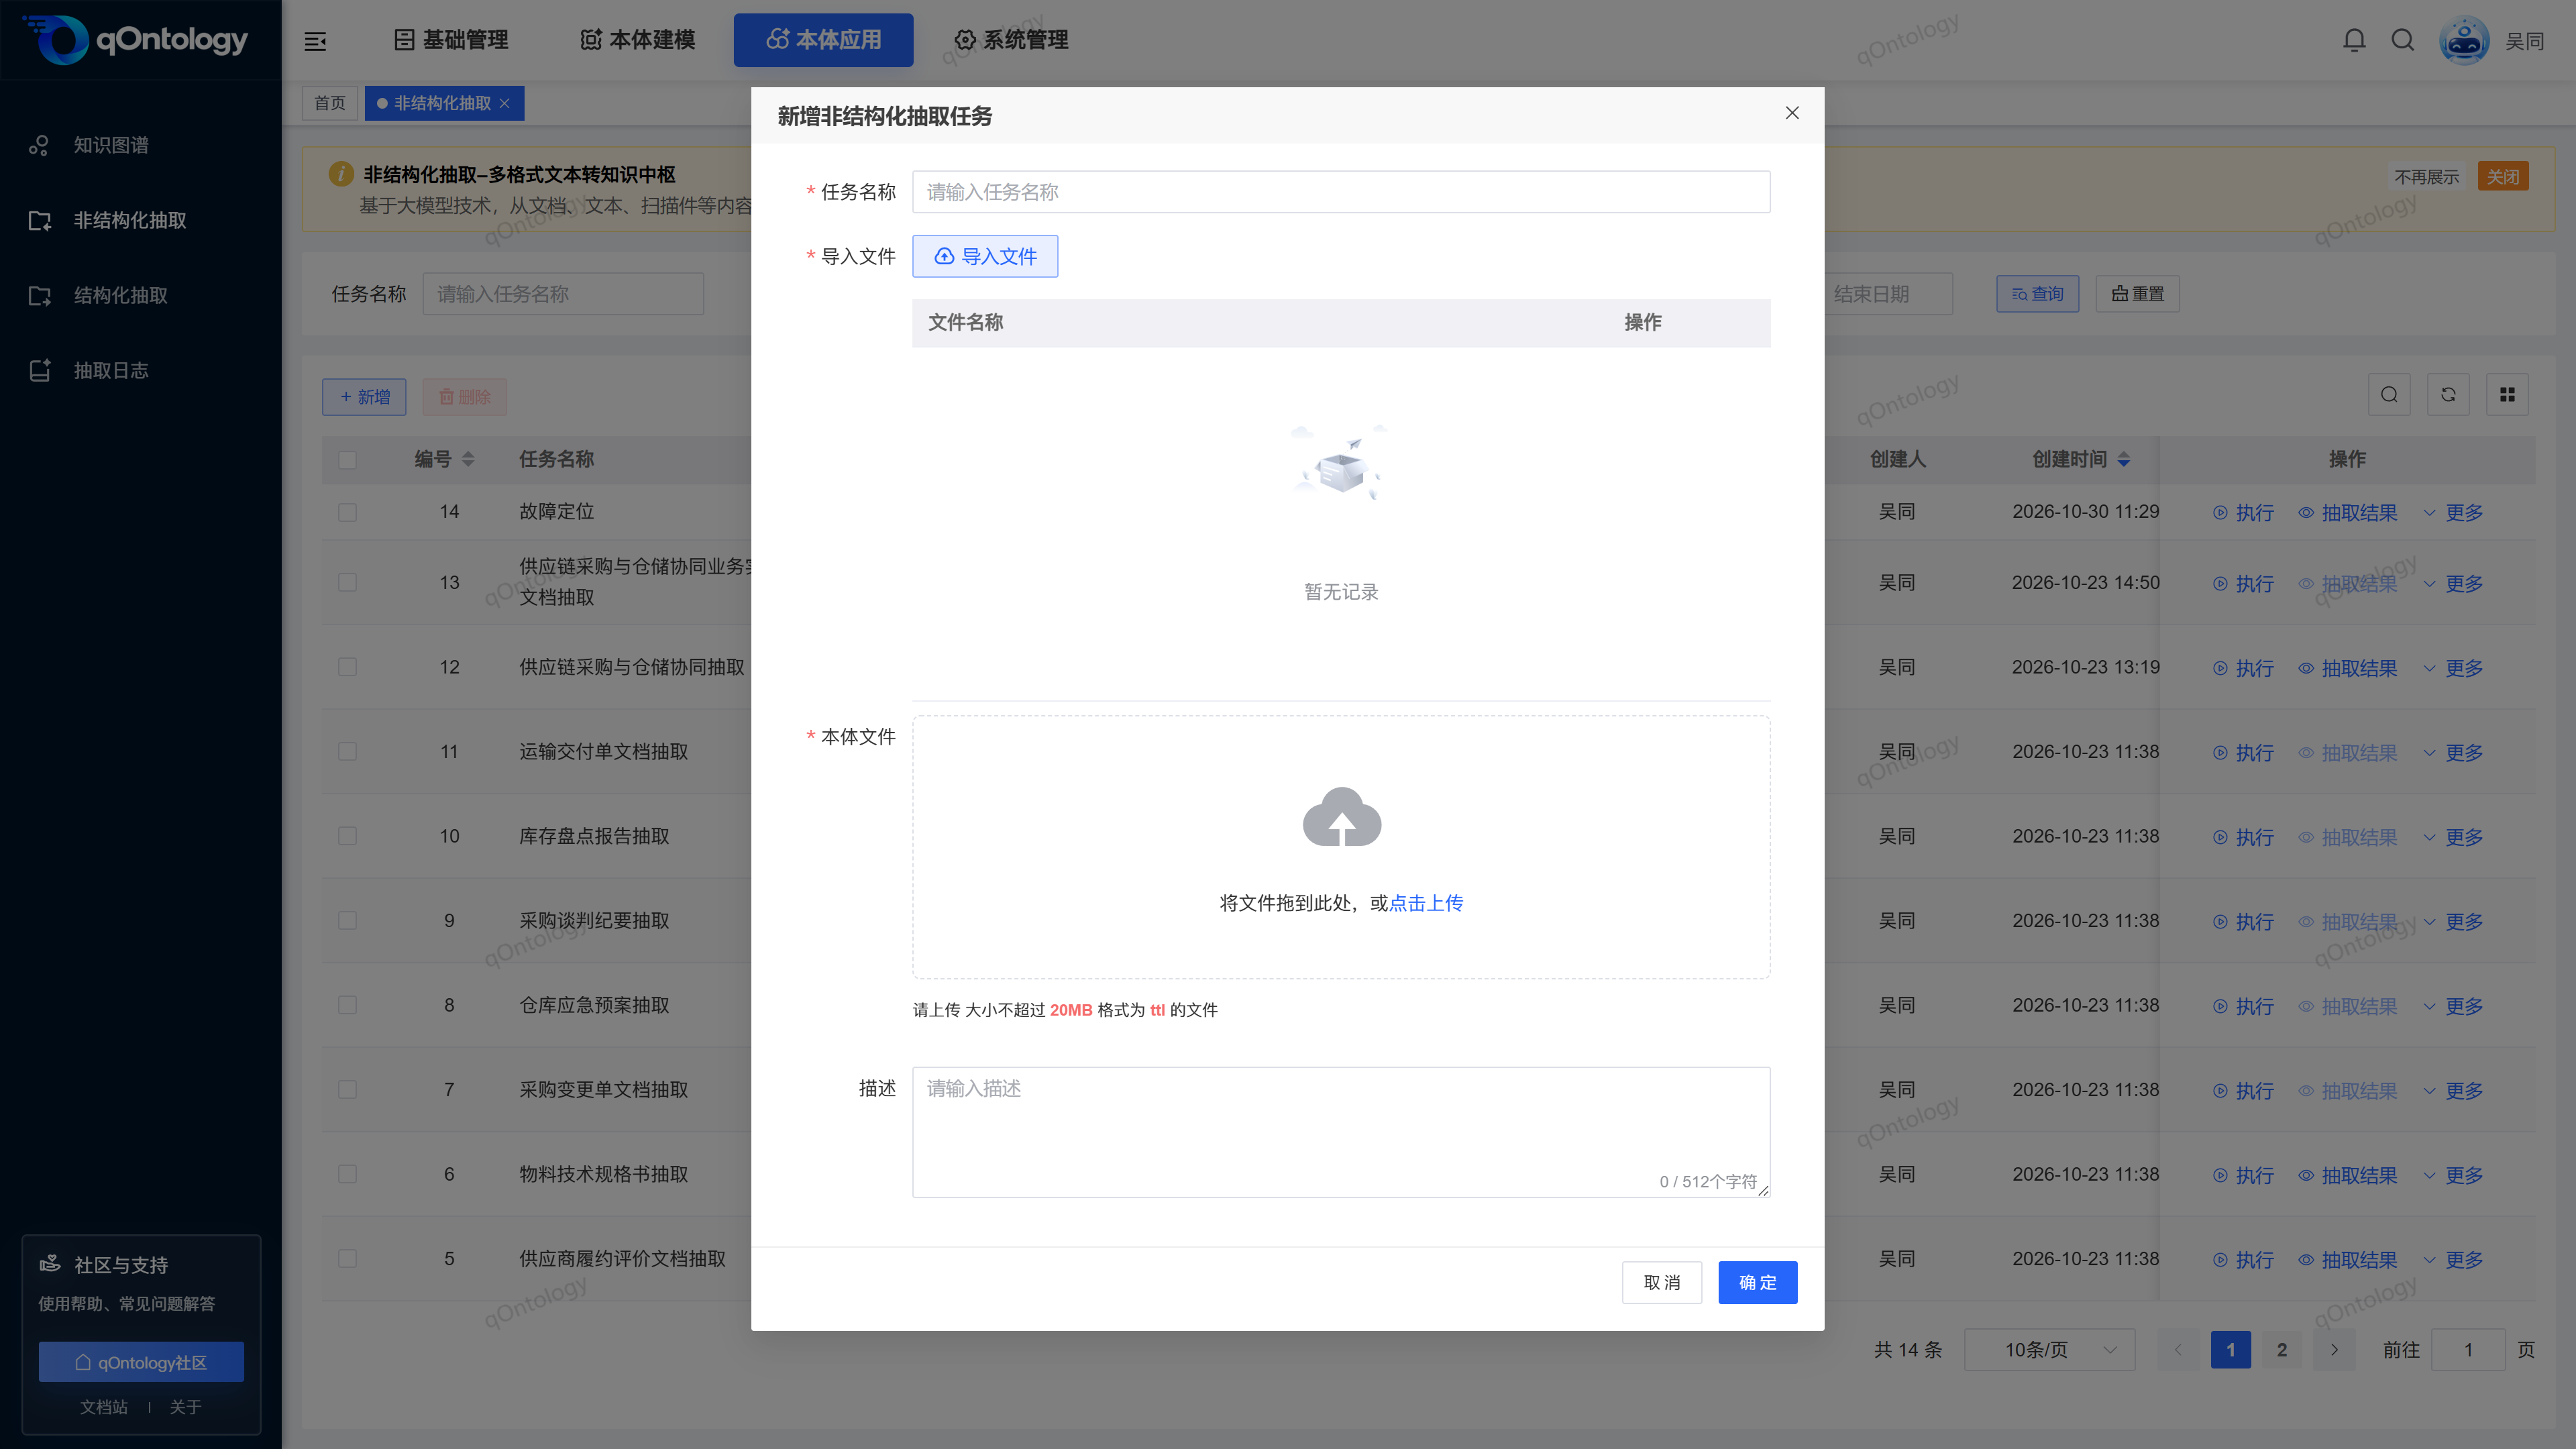
Go to Ontology Applications > Unstructured Extraction and click Add:
- Enter “Purchasing Relationship Demo Extraction” as the task name.
- Click Import Files, select “purchase-order-example.txt,” and confirm.
- Upload the ontology
.ttlfile exported in the previous step. - Click OK to save the task.
- Click Execute on the task's row, check its name, and confirm.
After submission, refresh the list to check the status. On the task's row, open More > Execution Logs to review progress. If the task is queued or running, wait for it to finish. If it fails, use the logs to check the input document, TTL file and extraction service configuration first.
Check: The task status changes to Executed, and Extraction Results becomes available. A successful save or a queued status only confirms submission.
7. Review and publish the extraction results
Click Extraction Results on the executed task's row. Inspect the entities, attributes and relationships in the graph, and compare them with the sample document:
| Check | Expected content |
|---|---|
| Purchase Order entity | Order Number is PO-001 |
| Supplier entity | Supplier Name is Qiantong Sample Supplier |
| Relationship between entities | Directed from Purchase Order to Supplier, meaning “Specifies Supplier” |
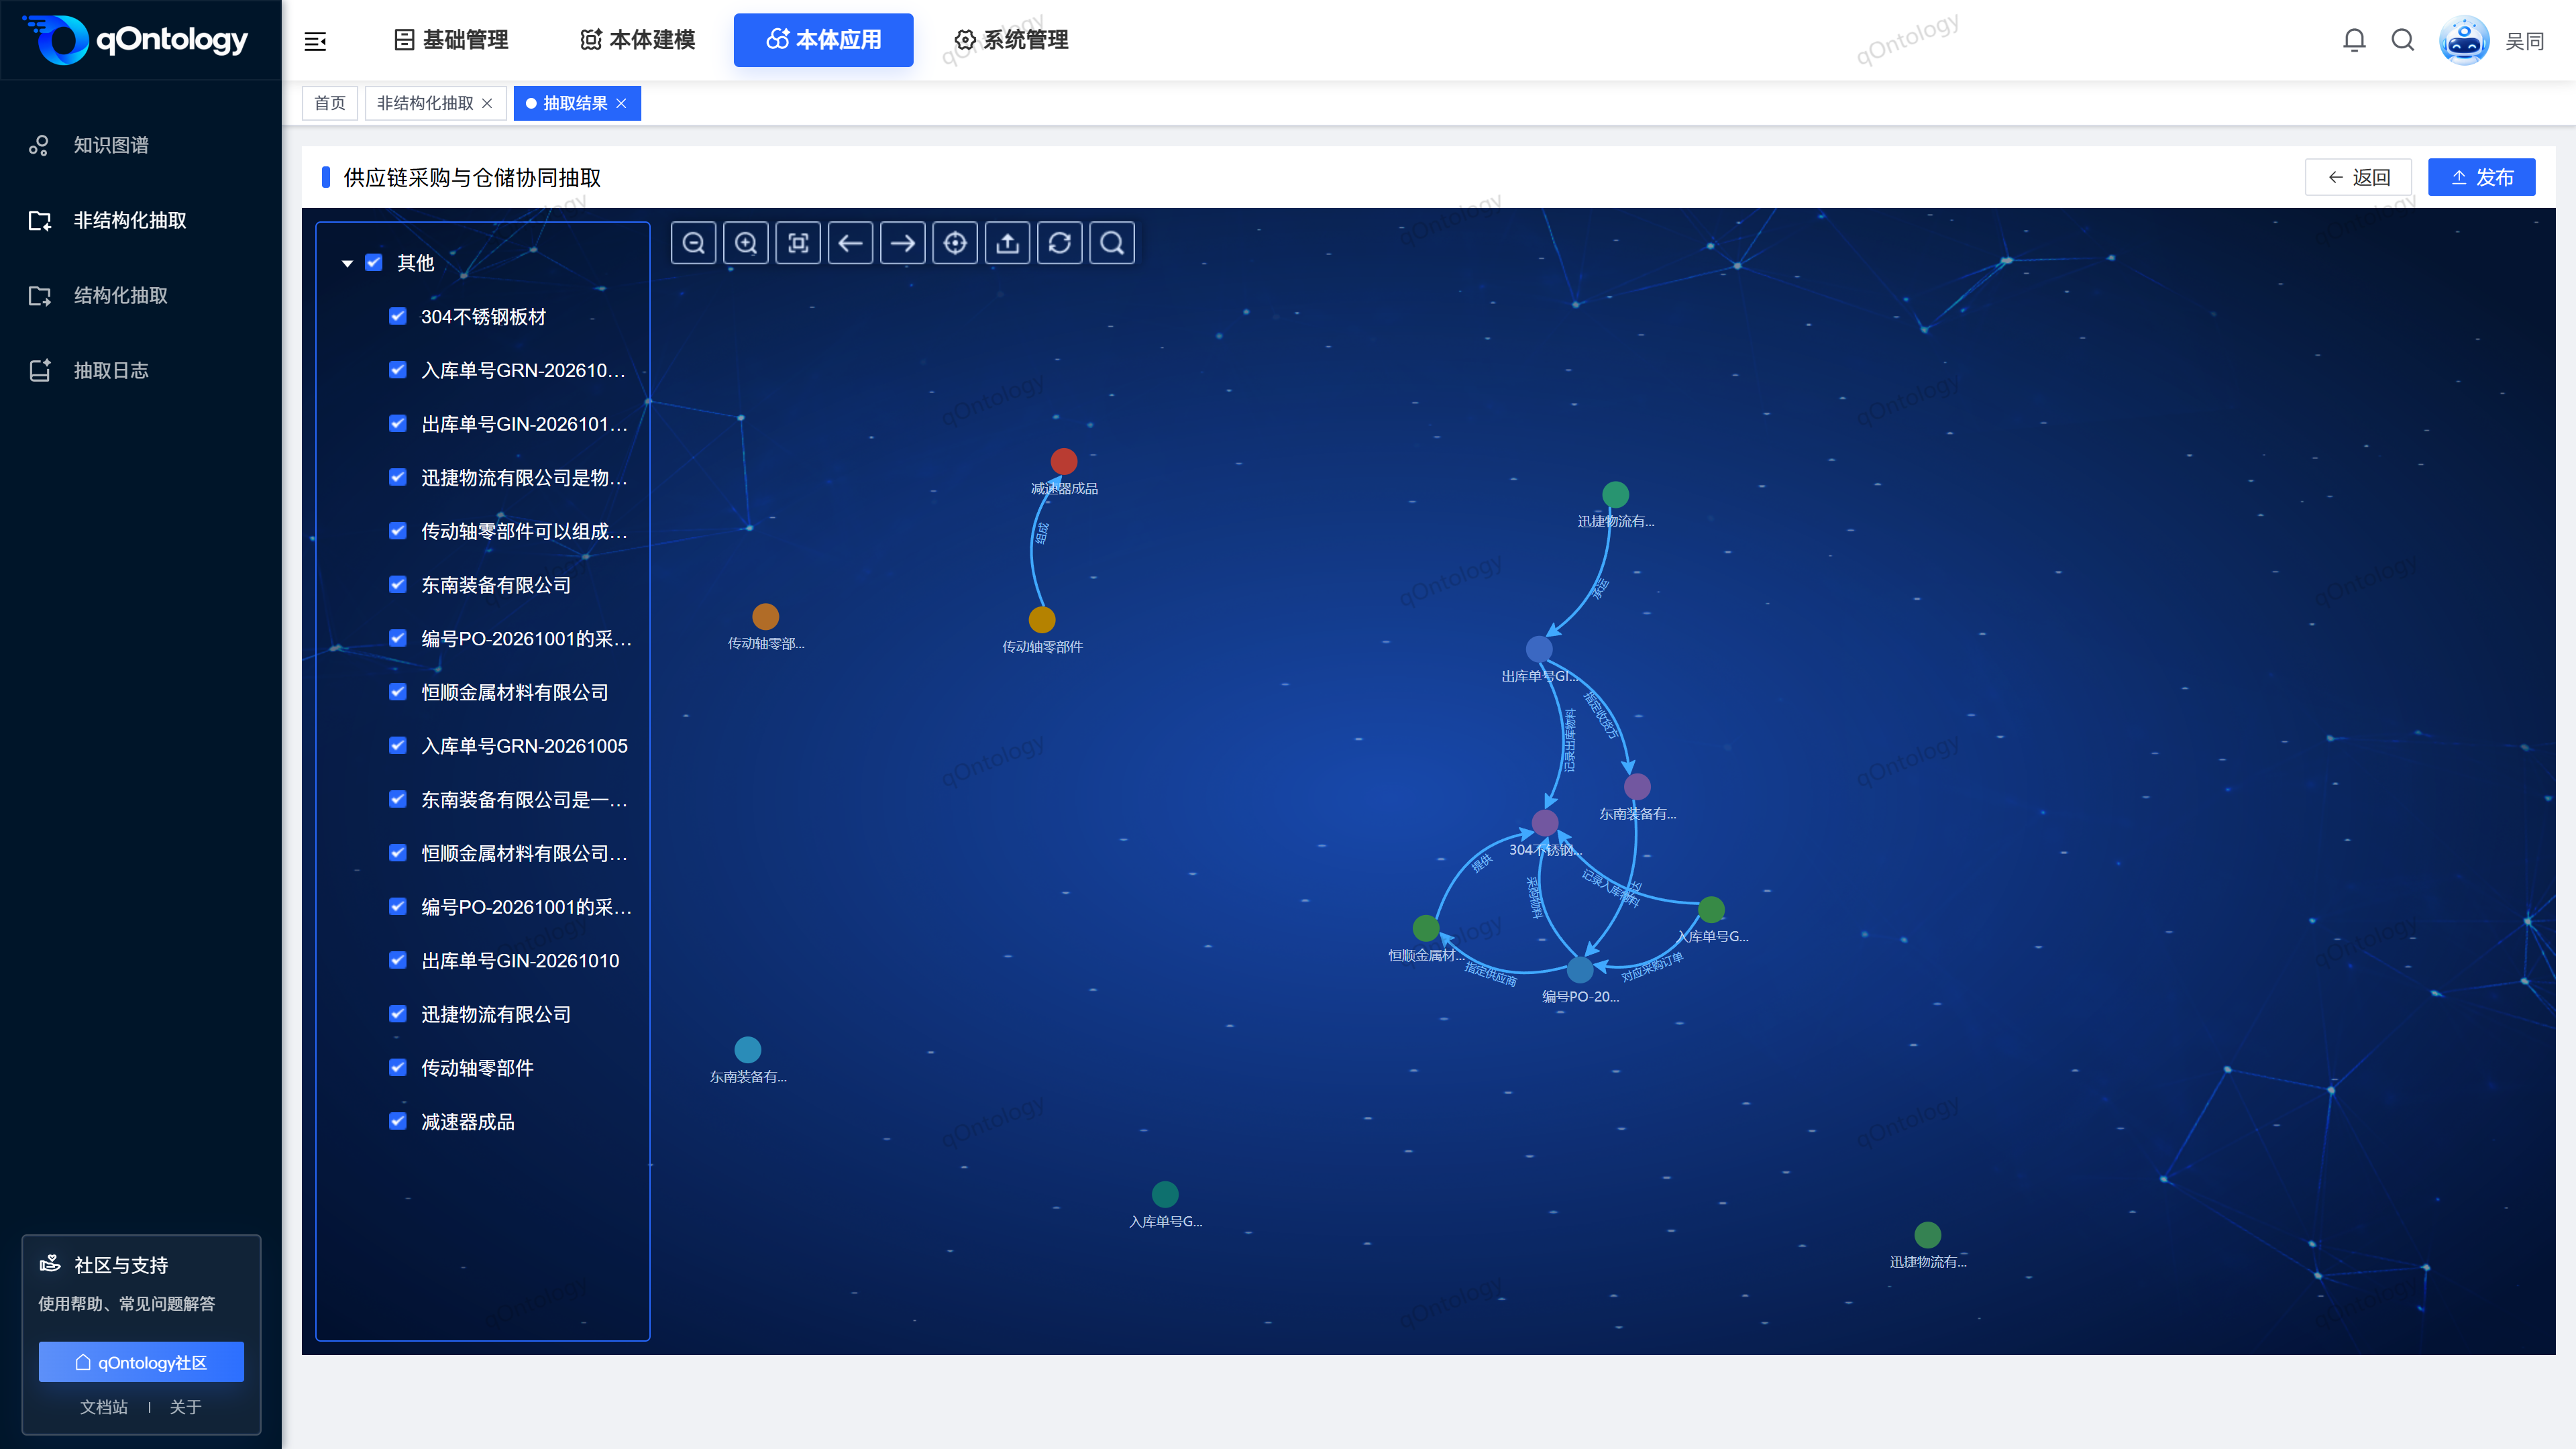
Extraction results require human review. If there are omissions, duplicates or incorrectly directed relationships, check the model and source document first, then follow the Knowledge Graph instructions to correct the results. Once the content meets your expectations, click Publish, confirm, and return to the list to check the publication status.
Check: The task is shown as published, and the reviewed entities and relationships match the sample business description. You have completed a walkthrough from a business question and ontology modeling to publication of extraction results.